Sunday, December 25, 2011

Haircut styles

Haircut styles for the year 2008 come after a year 2007 where mostly shorter hairstyles ruled, longer haircuts still flourished, and everyone was in love with the bob haircut. Most of the celebrities went for medium and shorter lengths and the fashion runaways brought in many very unique trends like the pony loop and the high ballerina-bun hairstyle. Update your haircut with one of these hot trends that will dominate in year 2008. Some of these are actually repetitions of hairstyle before. They are all set to make a comeback with much style and elegance.
Bob - haircut style
It was only ever going to give way to a more traditional style: 2007's pob hair style and trend has given way to the bob in 2008, and it's simply perfect for the year.
fall winter hairstyleThe Fringe - haircut style
Maybe that the fringe haircut trend died in year 2007, won't it die again in 2008? Normally you'd think so, but with Kate Moss on hand to keep it insanely popular in the first half of 2008, and the next James Bond film, Quantum of Solace, to keep it popular in the second half, getting yourself a fringe is a certain way of staying on trend.
Artist Hair

Soft and Feminine haircut styles.Again tied into the 30's of the last century, soft feminine hairstyles will make it to 2008.


feminine hair 2008 trend

Summer Hair - How to Dye Hair Blonde

How to Dye Your Hair Blonde - Summer 2009

With blonde being considered to be beautiful, women all over the world are trying to get in on the action by dying their hair blonde and with the economy going into crisis, so many of them are attempting the sassy look at home. There are a few rules and tricks that you can use when thinking of dying your locks blonde and it could be these that save you from a complete hair disaster!

Latest Spring Summer 2009 Hairstyles Edition - Blonde Hair
Dye Blonde Hair
First of all, it must be remembered that you cannot just chuck a packet of blonde hair dye on dark hair and expect it to go a wonderful platinum blonde color. This will simply not happen and will more than likely have no effect on your hair color at all. For darker hair, bleach blonde will be called upon and ideally this should only be done in a salon. If this is out of your budget however, there are some relatively good bleach blonde packets that you can buy to use at home. You should still bear in mind that you may need to have another dye to use once this bleaching has been completed however as the blonde look that you get may not be the one that you want from the start.
With darker hair, it is always better to go lighter in shades rather than all in one go so brown hairs should keep going for a lighter brown until a blonde will cover the hair. You should always remember to deep condition your hair before hand as continual dying of the hair can really dry it out. If all else fails, you can always save and try a hairdresser to get the look that you want.

Long Emo Hairstyles 2012

The emo hair style is the most fashionable and ‘in’ these days as girls and boys want to look different and stylish. The word ‘emo’ has been taken from the Emotional Punk Movement in which the people who were dedicated to this movement had different culture, ideals, values and fashion as compared to the other cultures of the 80s.

Long Emo Hair

long emo hair

Similarly, the emo hair styles are different so that the people who want a unique look and dose not want to be one among the herd, can get their hair cut in the emo style. The emos were considered to be following their own fashions and trends so as to have their distinct styles.

Long Black Emo Hair

long black emo hair

The typical emo hair cut needs a pair of scissors or razor and dyes so that one can cut one’s hair according to his or her style and attitude. People with long emo hair experiment with different styles like getting them curled, or ironed so as to give their hair a new look. Long emo hair is mostly preferred by those who have bushy hair as maintaining them becomes much easier than small bushy emo hair.

Messy Mad Rad Emo Hair

messy mad rad emo hair

Long emo hair looks best when they are braided. Styling your long emo hair with knots and buns also gives an elegant look to your personality. Last but not least, different types of ponytails can also be made from long emo hair so as to give your hair distinct styles each time.

Black Blond Emo Hair

black blond emo hair

Multi Color Long Emo Hair

multi color long emo hair

Summer hairstyles for long hair

Haircuts fashion and trends for wavy hairstyles in 2009

Women with wavy hair are well aware of the extent of natural waves in their hair. Different length hairstyles will have different effects on the wavy hair; a hairstylist should be the best person to suggest a hairstyle which will best suit your facial features as well as wavy hair. One classic example which suits wavy hair is the Veronica Lake style which covers one eye while sweeping the forehead and is a shorter version of the medium length original hairstyle. This hairstyle is not only glamorous, but is also more feature accentuating than the original medium length version.

Britney spears wavy hair

Women with wavy hair have lots of options and choices in terms of hairstyles and haircuts. One can go for hairstyles meant for wavy hair which are fun and funky, and at the same time compliment the facial features. A perfect complimenting hairstyle has the ability to contrast with the quality one’s skin and can successfully surround it to create an enchanting play of radiance.

long curly hairstyle

Carrie Underwood hair

Haircuts fashion and trends for wavy hairstyles in 2009

Leona Lewis hairstyle


long hair style

Haircuts fashion and trends for wavy hairstyles in 2009

long face hair style

Haircuts fashion and trends for wavy hairstyles in 2009

summer curly hairstyle

Haircuts fashion and trends for wavy hairstyles in 2009

Friday, December 23, 2011

CONFIGURATION BOXES for CHRISTMAS

Here's myYouTube video, showing all five of my Christmas Configuration Boxes.


This is the first one I've done all by myself, so I hope you enjoy it (don't forget to turn the sound on).

pink saturday

Finally, please visit Beverly at How Sweet the Sound to see all the wonderful Pink Saturday Christmassy posts!

Happy Christmas, everyone!

Thursday, December 22, 2011

HAPPY CHRISTMAS TO YOU ALL

Here's a vitual Christmas card from me to all of you - feel free to post onto your own blog if you'd like to (left-click for the full size, and right-click to copy).

Created using Cajoline's Kit Noel Blanc- image from Tumblr

Wishing everyone a very Happy Christmas!

Wednesday, December 21, 2011

FREEBIE BLOG BACKGROUND - REINDEER

Background copyright Susie Jefferson, using images from Holiday Paper Pack 3 by Cesstrelle at HG Designs
Here's a new freebie Christmas background for you, using reindeer images from Cesstrelle's Holiday Paper Pack 3. Isn't this fun? Perfect for someone who wants a modern image with a bit of an edge.

This will fit most templates: 3-col, wide 2-col and also some of the freebie WordPress templates like Bueno. It will also fit some of the freebie Tumblr blog templates, eg: Redux. The Blogger template I've used here is Awesome.

BACKGROUND CODE

Just copy and paste all the code below into an html box in your sidebar.
<style type="text/css">
body {background-image: url("http://i659.photobucket.com/albums/uu313/1stFloorFlatComputery/3a093400.jpg"); background-position: center; background-repeat: no-repeat; background-attachment: fixed; }
</style>
<div id="tag" style="position:absolute; left:0px; top:50px; z-index:50; width:150px; height:30px;">
<a href="http://1stfloorflatblogology.blogspot.com/" target="_blank">
<img border="0" src="http://i659.photobucket.com/albums/uu313/1stFloorFlatComputery/9061ddc2.png"/>
</a></div>

HEADER

If you want to customise my header with your own text, right-click the picture to open to full size then left-click to save to your own computer. Add text using your favourite graphics programme, then load up and click' Instead of Title and Description'.

Otherwise, just save the header and click 'Behind Title and Description' to use Blogger's own default header text (click the Resize button if you want it smaller) or copy the code below and enter that instead.
http://i659.photobucket.com/albums/uu313/1stFloorFlatComputery/75d8d6cb.png
Check out Cesstrelle's blog HG Designs for more fabulous papers, brushes, textures etc.

Thursday, December 15, 2011

CHRISTMAS TREES... O CHRISTMAS TREES...


Kaye (co-owner of BladeRubber Stamps) and I were chatting, as you do, when I took the wreath in for her shop window - and I happened to mention my Christmas decorations (3 trees this year). Kaye couldn't believe I could get 3 Christmas trees in the one living room. Hah! Oh yes I could!

Panning around the room, starting from the far left, here's Tree No 1 (4ft) next to the television. One of my Configuration boxes to the right of the television.
Closeup of Tree No 1 (4ft): Santa at the top, and two sets of lights, glitter reindeer standing underneath
The TV bench is on the left of this door, lights strung right around up at the ceiling and Tree No 2 (6ft) with 3 sets of lights and another Santa. Another Configuration box is on top of the bookcase.
Closeup, showing Tree No 2's tree skirt. Fireplace on the right.
Tree No 2 (6ft tree) on left, Tree No 3 (3ft tree) next to the computer desk on the right. Fire in the middle, with Santa lights on the mantlepiece. Tree No 3 has only the one set of lights and now feels very underdressed.
That's it for now... you can tell I just adore Christmas!

How are your decorations coming along? Got your tree up yet?

Monday, December 12, 2011

MY LATEST WREATH


This is my latest creation - using vintage pine cone ornaments (50s) plus some modern bits: the sequinned and tinselled apples and branches.


Here's a closeup, showing my own snowballs (heavy gel medium applied with a palette knife onto polystyene balls, then glittered with 3 different types of glitter all mixed up).


The base is a simple twig wreath, which I wrapped with a single length of tinsel to bulk it out - then in with the sparkly and glittery twigs etc.

My other wreath (scroll down a couple of posts) is the traditional reds and golds, etc.

Glue guns are now my very bestest friends!

Sunday, December 11, 2011

BAH HUMBUG - MORE BLOGGER HEADACHE!

Copyright-free image from Tack-o-Rama
A friend contacted me, asking for help as her blog is now only showing one post at a time! What makes it worse is that resetting the number of posts to show on a page didn't work.

Why? Good old Blogger has done it again: they have now introducted autopagination as this article explains. And NO, you can't disable it (I just spent 4 hours trying).

These things do settle down... I had 3 weeks of my Older, Newer and Home buttons not working at the bottom of a page back in the summer, and this righted itself in time. Ditto around 5 weeks of being unable to leave comments. But it's really frustrating when it happens!

I think for my friend things have been made worse because her blog is privately hosted, not a Blogger blog. And I just found out we don't own our own content - Blogger does! Yikes! What with the Picasa scandal (click on Picasa in the labels section of my sidebar if you want to read the rants) I am really getting worried about Blogger again. I love the format, I've even forgiven them for trying to stop us customising the layouts ourselves... but this might just be a step too far.

Copyright-free image from Tack-o-Rama

Over the Christmas holidays I'll be reinvestigating Tumblr and WordPress (again) and will report back.

We really don't need this just now!

Friday, December 9, 2011

PINK SATURDAY - TOOL KIT PREZZIE

Decoupaged tool kit for the geek in your life (or your DIY drawer)
I'm sure everyone is like me: frantically busy, just a little broke, and therefore looking to give handmade prezzies (that don't look HOME made - there is a difference). So I thought a quick and easy project might be just the job! Perfect for anyone, and unusual too! It's a TOOL KIT!

This was inexpensive, but doesn't look too cheap (although the plastic case was a dead giveaway, hence the decoration)
This is just a cheap basic tool kit you'll find in most hardware stores, a good size for changing plugs and other small electrical stuff (women need to be able to do this too, lol) also poking holes in signatures for books, levering out staples, prising drawing pins out of walls etc.

Front and back prepared in exactly the same way - just change the positioning of the decorations

PREPARATION

As it's plastic, it's rather slick and not good for gluing, so sand a little first, just enough to roughen the surface (use an emery board if you don't have sandpaper).

DECORATION
  • Couldn't be simpler: leftovers of scrapbooking paper for the front and the back, cut to size. 
  • Collage the ticket on first, then overstamped some text (using Staz-On ink).
  • The dots were Punchinella (sequin waste) used as a stencil, stippled with acrylic paint. Move the stencil and stipple again, creating a drop shadow using a metallic paint. 
  • Finally, decoupage a vintage scrap image of a clown's head.
 I used PVA (white glue) throughout. Mod Podge is also good.

Next step: glue to the tool kit using a good quality strong glue such as Crafter's, Gorilla, Aleene's Tacky Glue or use double-sided tape. You don't want this peeling off at a later date.

Finishing touches: I ran a metallic gold pen round the edges, then applied a single coat of clear acrylic varnish for protection.

TIME TAKEN

Very fast - took around 2 hours including coffee and biscuits, and drying time!

pink saturday

Finally, please visit Beverly at How Sweet the Sound to see all the other wonderful Pink Saturday posts!

Wednesday, December 7, 2011

50s CHRISTMAS SCRAPBOOK PAGE AND CARD

I used a copyright-free 50s image as the main photo, as I wanted a retro feel
Thought you might like to see a Christmassy scrapbook page I did as samples for Blade Rubber Stamps, plus a stepper card - both using the same design of background paper and chipboard embellishements.

View from the front - notice I did a little background stamping with snowflake stamps onto the base red card. I also trimmed round the edges with gold peeloffs. The Tree chipboard element was mounted onto separate gold card and rimmed around with gold glitter.
I also stamped on the centre red band of the tree (which was plain) and added baubles - some were the chipboard elements, and the rest were little metal hearts cut from an old necklace. All 'antiqued' with Rock Candy crackle paint.
View from the side, showing the steps and the dimensions. The darker snowdrops are stamped with Versamark ink, then embossed with holographic embossing powder.

I 'antiqued' the chipboard pieces using Tim Holtz's Distress Crackle Paint in Rock Candy (which is clear, and a couple of coats give a lovely spun sugar sparkle - very vintage).

A little on the cute side for me, maybe, but the 50s feel definitely saves them. Nice and colourful, no?

Wednesday, November 23, 2011

SNOWMAN CONFIGURATION BOX

Snowman box - lit up
Here's my Snowman Configuration Box, all lit up. 

Snowman - detail
This one's more for the kiddies, with lots of snow, a snowball under his feet, prezzies... and white bobble braid (more snowballs anyone?)

Detail - little bottles spelling 'Joy', and another bottle with Christmas Cheer spilling out of it (and some more prezzies at the side
Fun, huh?

Friday, November 11, 2011

PINK SATURDAY - GETTING READY FOR CHRISTMAS

My 'NOEL' Configuration box - I'm teaching this next week at Blade Rubber Stamps!
I know it's early, but if you're making your own decorations you really need to start NOW!

My excuse (not that I needed one) is that I'm also teaching a couple of classes shortly, so of course I've got to make my samples. I'm totally in the mood, and can't wait to put up all our decorations on 1st December. So... if you want to make some too (or overhaul the ones you already have) here's some inspiration.

My own wreath, for my Christmas Decorations Special class at Blade Rubber Stamps
Closeup of my wreath for the Christmas Decoration Special class.

The secret with wreaths (and any decoration, really) is lots of dimension, lots of glitz and glitter, lots of reflective surfaces and lots of colour. And lots of lights.

My 'NOEL' box - closeup - unlit
My 'NOEL' configuration box - closeup - lit up (including a little LED light up the skirt of the blown glass angel on top)
The box unlit, in daylight
All lit up for the evening
Closeup of the tree, the other lights and the German glass glitter - this tarnishes a little over time, adding to the atmosphere of the piece
Of course these rules can be broken: white on white, shabby chic, matt surfaces played off against glossy surfaces... don't take it all too seriously though -  it's supposed to be fun after all! If you don't have fun with your decorating, it show!

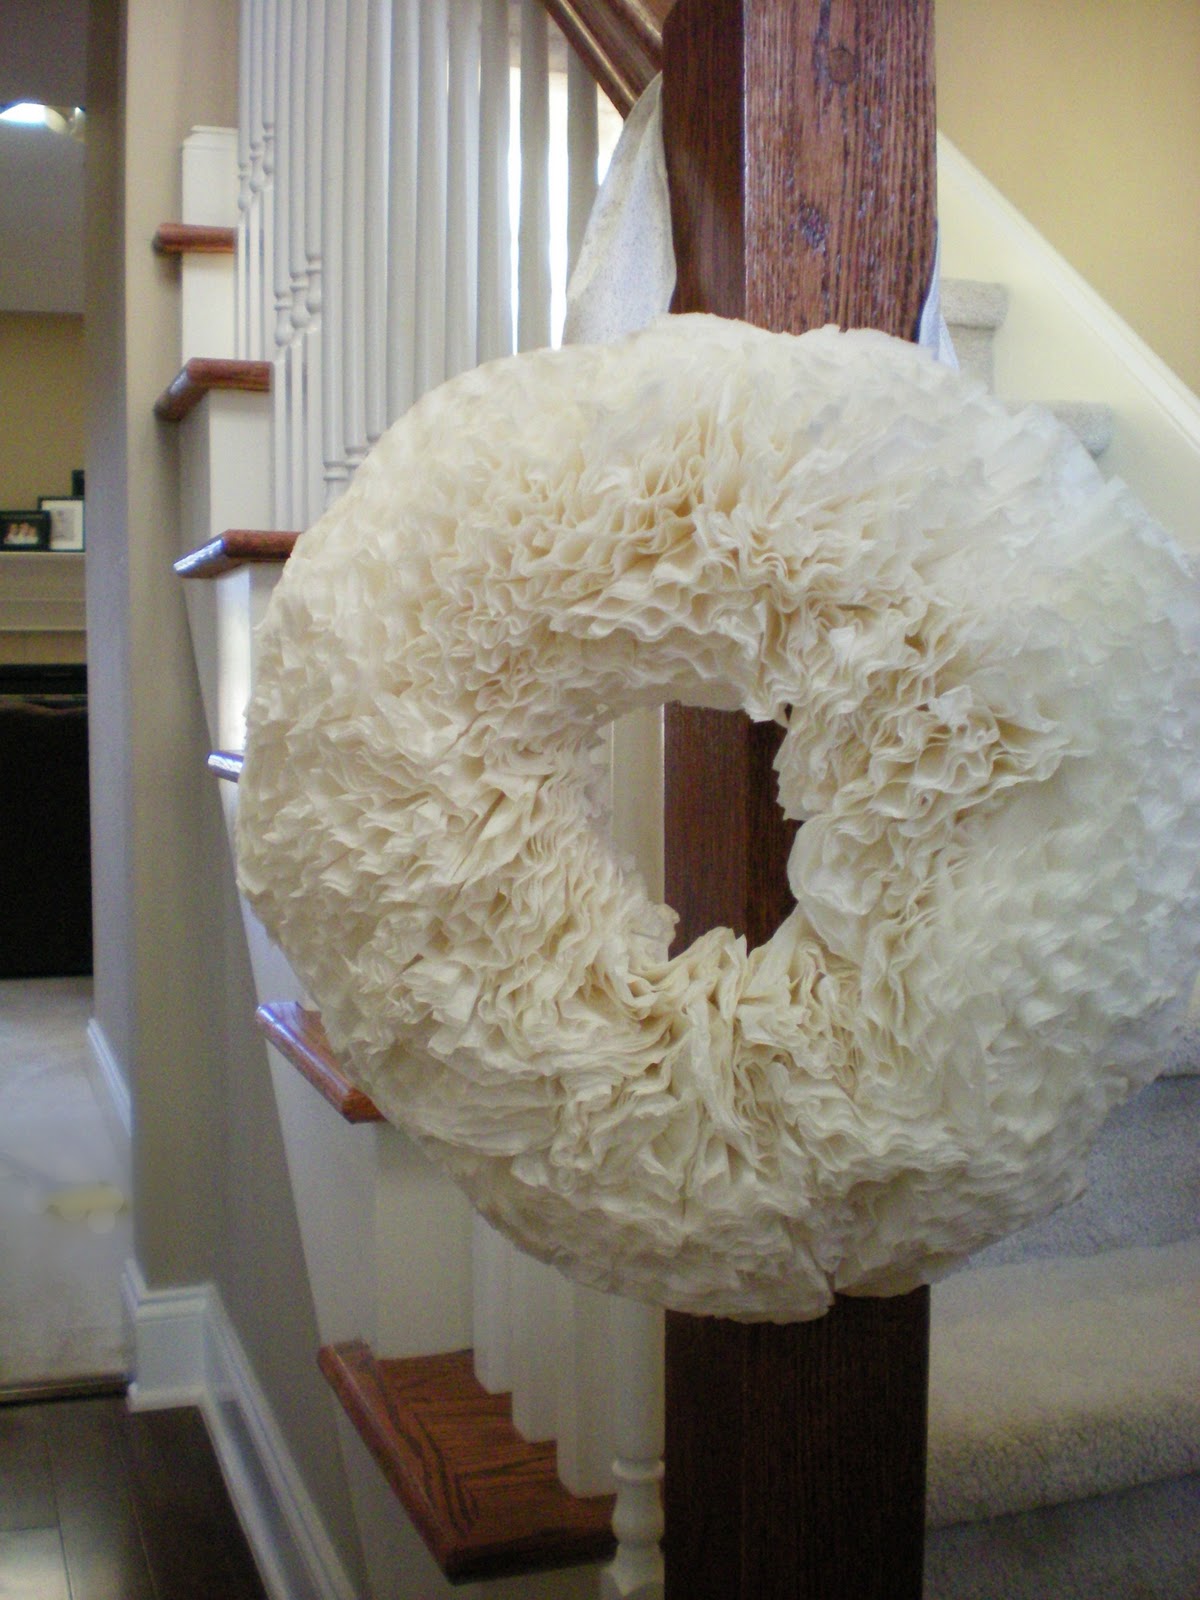
White wreath, pink ribbons and the sweetest little bird - wish I knew who made it! If it's YOU, please let me know
Off pinterest
Copyright HappyDotMom - click this link for the tutorial

Above is some inspiration I've seen online - I am crediting where I can (I lost a lot of my links when my old computer died) so if this is yours, and not credited and linked to you, please let me know so I can give credit where it's due!

Copyright Michele Kovak - tutorial here
I adore the cupcake ornament/place setting above - and can see this will adapt very nicely for snowball ornaments too.

Copyright Karina Guirre at Creative Chaos
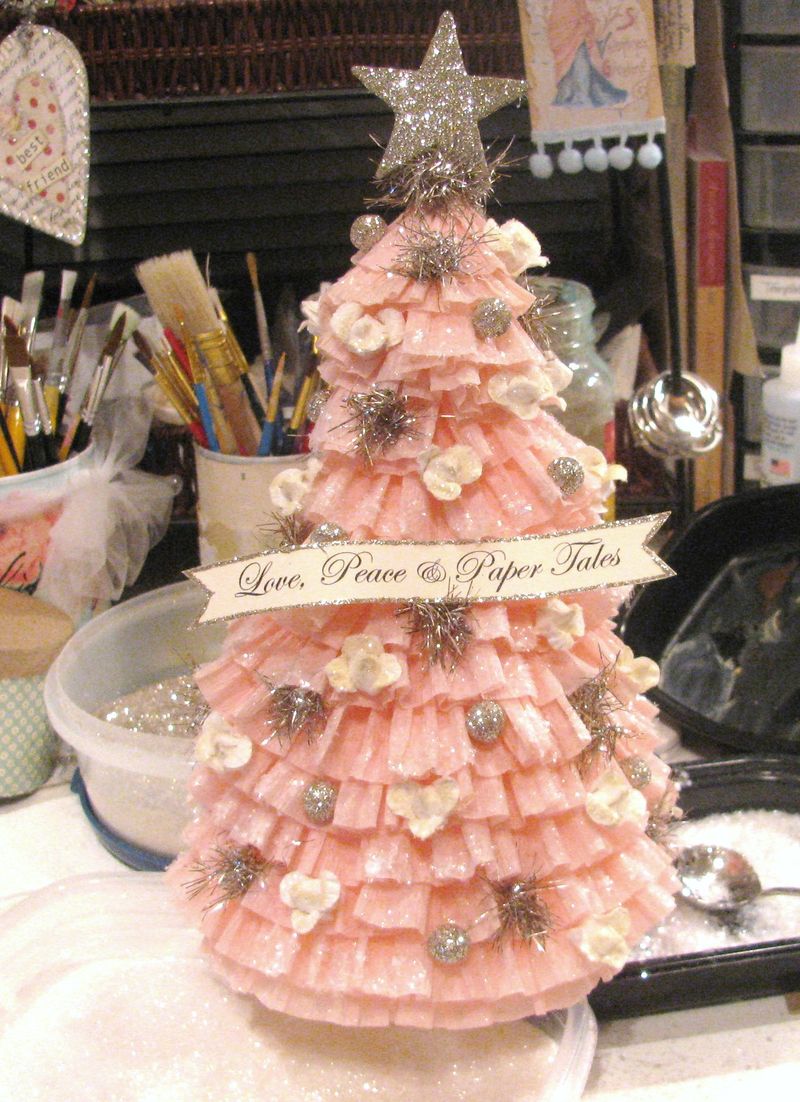
Above is the ultimate in do-it-yourself trees by Karin at Creative Chaos - I absolutely adore it.  A wonderful confection of crepe paper, tinsel and glittery balls (with a touch of artificial snow) her tutorial is here.

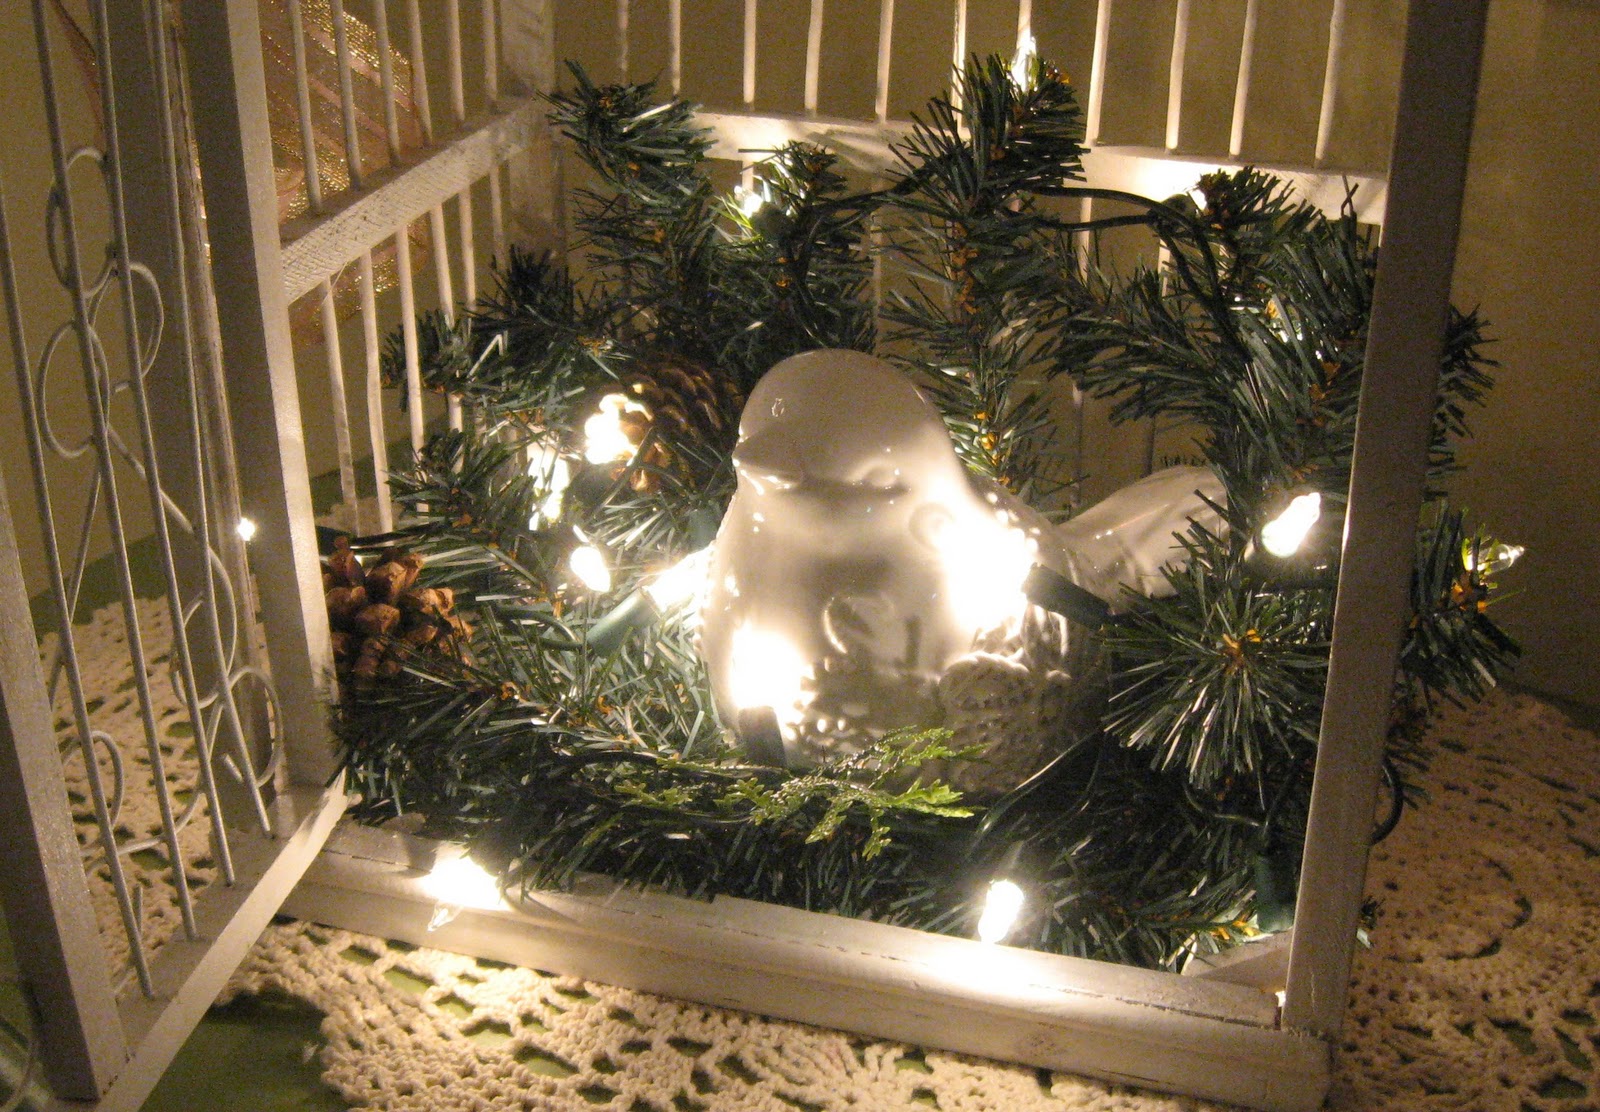
Finally, below is another wonderful display - with and without lights, adapting ornaments you probably already have.

Copyright Sandi for Christmas Pudding
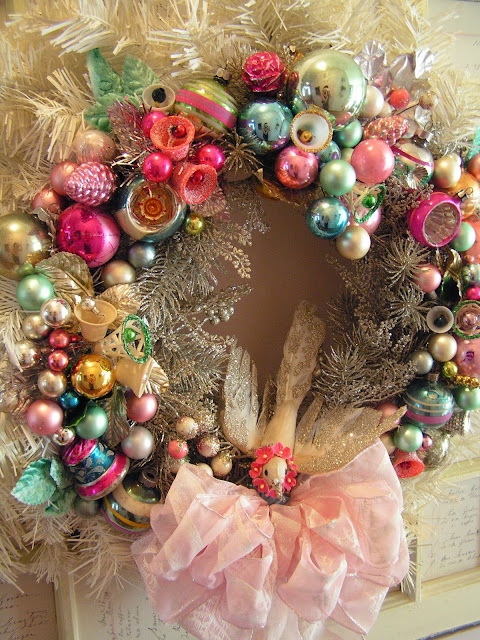
Copyright Sandi at Christmas Pudding - all lit up with LED lights nestling in the foliage
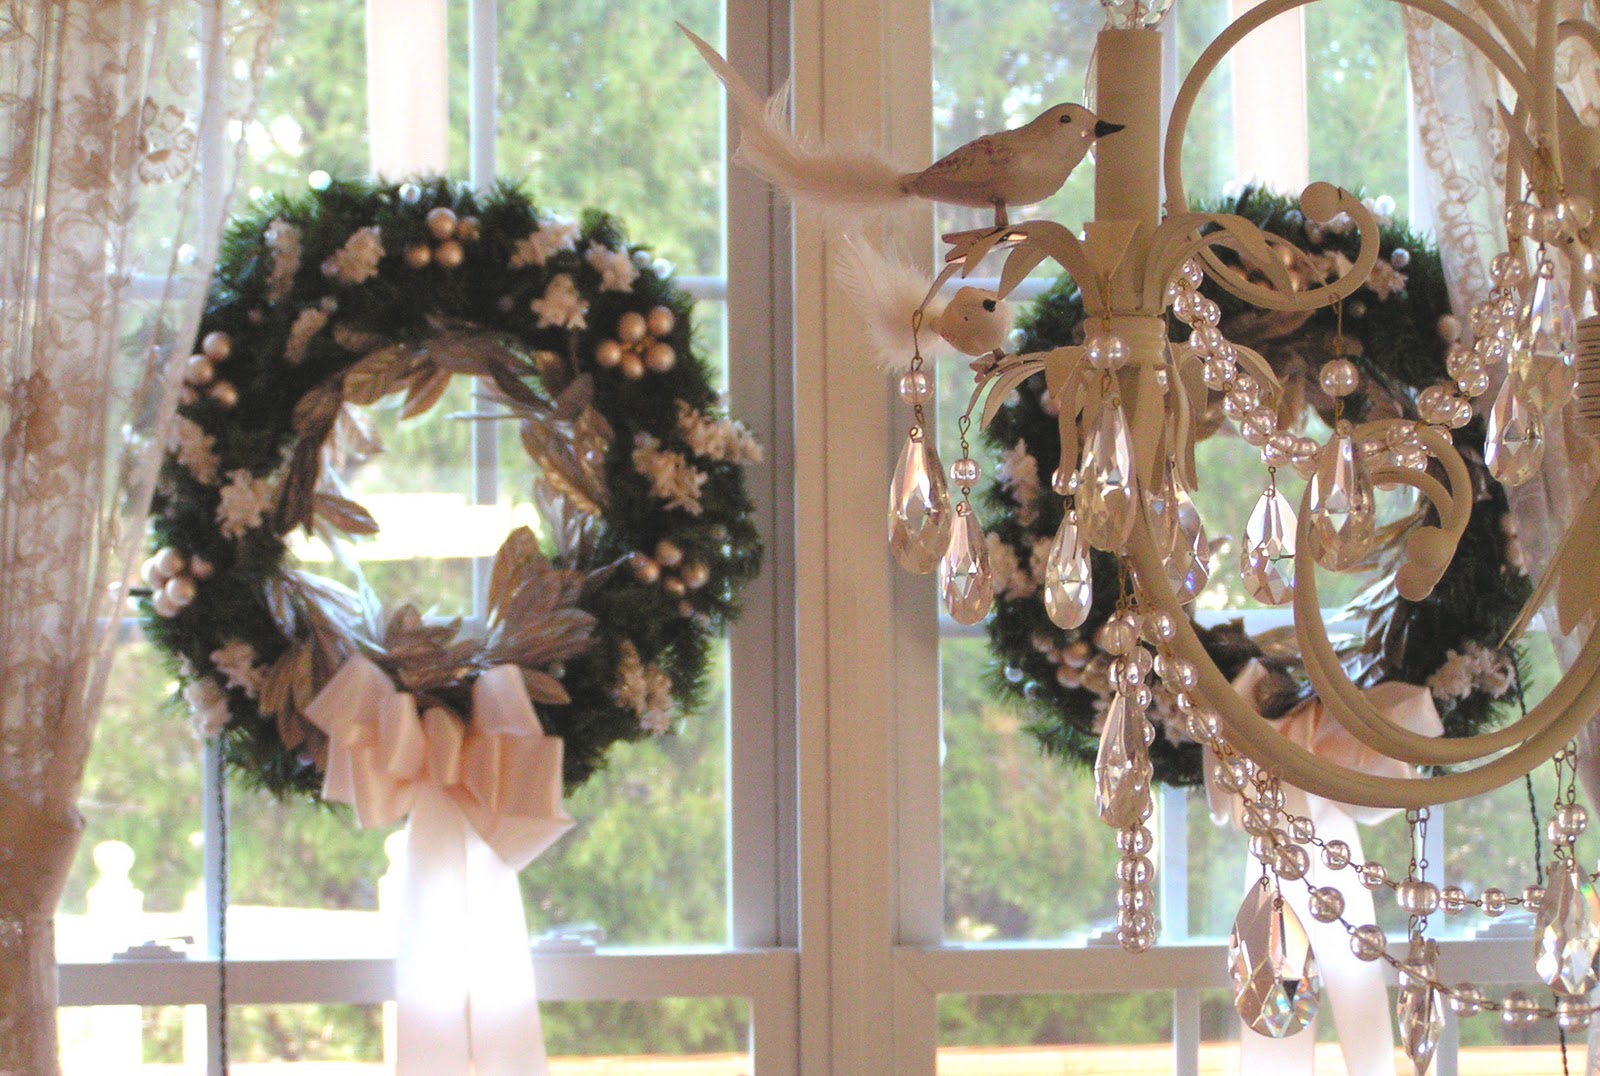
These images are copyright Sandi at Rose Chintz Cottage (who we all know and love)  - who also has this other wonderful blog: Christmas Pudding.As you can tell, I'm highly recommending using lights whenever and wherever possible.

For my freebie Vintage Robins background and header set, go here

Have you noticed Sandi's using my freebie Vintage Robins blog background on her Christmas Pudding blog?

pink saturday

Finally, please visit Beverly at How Sweet the Sound to see all the other wonderful Pink Saturday posts!