Friday, July 22, 2011

STAR WARS - PINK SATURDAY - MAY THE FORCE BE WITH YOU

Marcus Sinclair as Emperor Palpatine, Star Wars Exhibition at the County Hall, Westminster, London in 2007
This week my post doesn't have any pink... unless you count the heavy magenta around Emperor Palpatine's eyes!

I'm showing off (again) but am not apologising, as this has been rather an exciting week....
Me in 2007 with the most diabolical hair colour
- I do NOT suit blonde... but we all have try sometime, right?
No wonder Emperor Palpatine is laughing, and Darth Vader wants to chop my head off!

Back in 2007, I was commissioned to make a cloak clasp for Emperor Palpatine for the Star Wars Exhibition - and had to watch through the film several times, then freeze the DVD so that I could sketch the clasp.

My original sketch for Emperor Palpatine's Cloak Clasp, 2007 - plus the first brooch, cast in clay
From my sketch, I made a model in plasticine then cast a mould (silicon rubber). From this, I made the clasp in Polymer Clay.

Darth Vader loves us, really...
The first brooch: Marcus (the actor who was playing the Emperor in the exhibition) managed to pull off the brooch fastening (twice) so next we tried magnets, which worked really well. Then he dropped it.

Darth Maul - played by Seb Morgan
Me and Darth Maul in 2007
The second cloak clasp - luckily, I've kept the original mould - was made using magnets again - and this one lasted up until last year, when the exhibition travelled to Brussels, then Belgium. Things get broken, lost in transit, wear out, generally don't look as spiffy or pristine... whatever, this year they wanted a new one and I was extremely happy to be asked to oblige!
Version 1 - I made this one in 2007. As you can see, it's pretty big (actual dimensions checked from the film, so they are accurate)


Marcus Sinclair as Emperor Palpatine at the Jedi School, Star Wars Exhibit 2007

So here is Version 3.
2011 version - the third one I've made for the Star Wars event

This time, I've tried to make it indestructible - again, cast in polymer clay, and then I've soldered on the fixings: two large brooch fastenings to one side (so if one fails, the other one is there to reinforce it: actors are none to gentle when changing costume in a hurry) and on the other side two really strong magnets. I've used ones that are so strong, they'll work through thick fabric.

2011 version - with copper tape antiqued and soldered, plus soldered brooch fastenings - the magnets are on the right.

I got this gig via my hugely talented friend Stephen Du Toit, who is the Wardrobe Master yet again this season. He actually sewed the costumes for all the Jedi Knights, Emperor Palpatine etc (so I know he's sewing the 2nd magnet invisibly INTO the cloak). Not only does he make all these wonderful costumes: he also acts as an extra - and you may have seen him street and courtroom scenes in the latest Pirates of the Caribbean movie.

As you can see, it's pretty solid! I've tried to make it indestructible
I delivered the clasp to Stephen on Wednesday; the new Palapatine (Rob Maloney) came for his wardrobe fitting yesterday and really likes it, so I am a very happy bunny.

This was quite a flurry of excitement this week, and I just thought I'd share.

pink saturday


Don’t forget to visit Beverly at How Sweet the Sound to see all the other Pink Saturday posts!

Tuesday, July 19, 2011

BLOGGER - the latest hiccup

Copyright-free image from Tack-o-Rama
Just to let you know - the latest hiccup with Blogger isn't Blogger itself - it's the latest versions of Internet Explorer.

Pages link bar on Firefox - all the links are there
Internet Explorer - only the Home page shows
If you use IE, you may want to check whether your Pages widget is showing as it should. If you set it to be horizontal in a line under the header, you may well find it showing veritcally, with one link under the other, instead of side by side. Or - as with mine - you may find they don't show up AT ALL! It's enough to make you tear your hair out!

Copyright-free image from Tack-o-Rama
However, here's a way to sort it out once and for all - put in your own text links.

First thing to do click on each page, so you have them all up on show in separate tabs, so you can switch backwards and forwards to get the codes easily. If you are on IE, and it insists on bringing up a new blog every time, try this: press the CTRL key + the link, and your page should open up in a new tab.

Next thing to do is go to your Dashboard and then Design > Page Elements view, click on Add a Widget and add an html widget under your header.

ADDING AN EXTRA WIDGET UNDER YOUR HEADER

Some of you (with certain of the new Design Templates) may find that Blogger refuses to let you do it, so you'll have to click on Edit HTML in your blog and actually get in there and change a little coding, to add an extra widget. It's always best to download a copy of your blog to your desktop, just in case...

Now you need to type in CTRL + F on your keyboard while in Edit HTML view - and you'll see the 'Find' box in a toolbar right at the bottom of your screen, just above your Start button.

Type: 
<b:section class='header' 
into the box, and you'll be taken to the correct section of code in your blog, which will highlight for you in green.

This is what you will see:
<b:section class='header' id='header' maxwidgets='1 showaddelement='no'>
You need to change the number of widgets to 3 (on some blogs, 2 is enough - but 3 works on ALL blogs) and 'no' to 'yes' - your code will now look like this:
<b:section class='header' id='header' maxwidgets='3 showaddelement='yes'>
Save it. Now when you go to Page Elements view, you'll see some new widget bars (one above your header, and one or two below it - OR - you'll find when you drag&drop an html widget into the same space as your Pages widget, that the blog will accept it.).

SORTING OUT A TEXT LINK BAR

Into your new html widget, you'll need to enter each page as a separate link.
<center>
<h2>
<b>
<a href="URL OF YOUR PAGE" target="_blank">Name of Page</a>
nbsp;
nbsp;
<a href="URL OF YOUR PAGE" target="_blank">Name of Page</a>
nbsp;
nbsp;
<a href="URL OF YOUR PAGE" target="_blank">Name of Page</a>
</b>
</h2>
</center>
I've done two for you, separated by Non Breaking Spaces (so they will line up horizontally next to each other). Just copy&paste as many links as you need. I've entered the coding vertically to make it easier to work with, but I promise you the link will display horizinally when 'live'.

The important thing to remember is to leave no spaces between the " symbols when entering the URL of each page address.

You'll see I've added this piece of code:
target="_blank"
This will make each link open into a separate tab. If you don't want that, just delete it.

Once you've checked you have entered all the page links, test them out - and THEN delete your Pages widget.

Copyright-free image from Tack-o-Rama
SUGGESTION

If you have a big blog, with tons of links and content, why don't you copy the entire contents of your new widget and create another html widget in your Footer area. Then people won't have to scroll back up to the top of your blog to navigate.

I hope this helps! (and I'll be archiving this post onto Computery).

Tuesday, July 12, 2011

GUEST POST SPOT

Copyright Susie Jefferson using an image from Tack-o-Rama
Thanks so much to Krista at While He Was Napping
- I was thrilled to be asked to write a guest post!
Success at last, lol lol lol

So if you always wanted your own email button, but didn't know how to do it, now you do! And here's the link on my own Computery blog.

Go for it, you know you can do it!

Sunday, July 10, 2011

WHICH ONE TO CHOOSE/

Eeny meeny miny mo - which to choose?
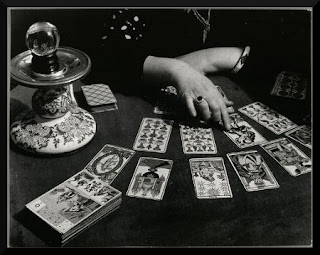
 Photo by Brassai


I've just been playing around with Wix, which offeres free flash websites (which you can customise, and also use your own registered name).

Here it is: 1st Floor Flat - it needs customising, and some content, but the basic shape is there...


And this is my usual one, which needs major updating (as soon as I locate my password, lost in the last computer crash): 1stFloorFlat  which I designed to be similar in feel to my blog as I wanted to create some continuity.

So here's my quandary - I don't know which I like best! Which to choose? Which one do YOU prefer?

I've got to do some major loading of artwork anyway, and update my classes list - so now is the time, if I'm going to change formats.

Friday, July 8, 2011

PINK SATURDAY - DESKTOP SCREEN SAVER & TUTORIAL

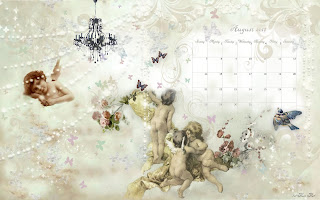
The screensaver I've designed - icons wherever you want them to go
(copyright Susie Jefferson)

This week, I decided to get my desktop organised. 

I've been reading a book from the library on how to care for your computer, cosset it, generally keep it happy - and discovered to my horror that my beloved Active Desktop Screensaver (which I've had for years) is Not A Good Idea!

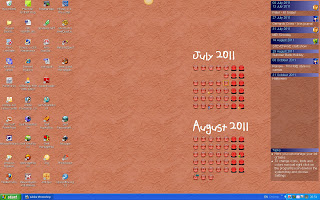
My old desktop screensaver - Active Desktop Calendar to
the right, and all my icons on the left in orderly rows
These use up loads of memory, and if your computer is temperamental and on the old side (yes, to both) then you really shouldn't have anything active on your desktop. No fancy stuff apart from icons. Well, I don't know about you - but I find the screensavers that come with my computer programme (Windows XP) are beyond boring!

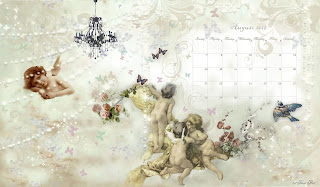
Screensaver at 1680 x 1050 resolution
Click here for the direct download
Screensaver at 1800 x 1050 resolution
Click here for the direct download
So I decided to make my own desktop calendar page for August, and here it is if you'd like to download it too. Left-click to open the folder at full size then right-click to save to your computer OR use the direct download links under the pictures.

TUTORIAL

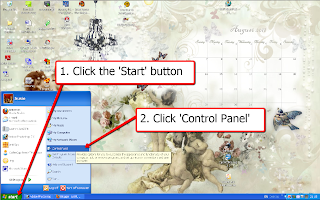
Here's how to install your own screensaver - and also put your icons where you want them!


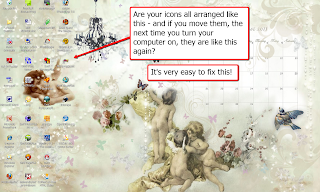
NOW ARRANGE YOUR DESKTOP ICONS WHERE YOU WANT THEM:


It's even easier than it looks! And if you want all your icons ordered into a grid or auto arranged - just tick the boxes again.Hope you like the screensaver and find it and the tutorial useful.

To enter your own notes and dates the easy way, either use your favourite graphics programme - or go to my Computery page and have a look at all the free programmes out there. Some you don't even need to download! And here's how to add a text layer:


pink saturday

Finally, please visit Beverly at How Sweet the Sound to see all the other wonderful Pink Saturday posts!

Friday, July 1, 2011

PINK SATURDAY - UNCLE SAM BLINKIE

Hi everyone! In celebration of Independence Day in the States, I've made an Uncle Sam blinkie! Do feel free to grab this if you'd like to put it on your own blog.

TAKE THIS CODE


<a href="http://1stfloorflat.blogspot.com/" target="_blank"><img border="0" src="http://i659.photobucket.com/albums/uu313/1stFloorFlatComputery/3ce9a407.gif" /></a></div>

Just copy& paste the code into an html widget right into your sidebar! I hope you have fun with it.

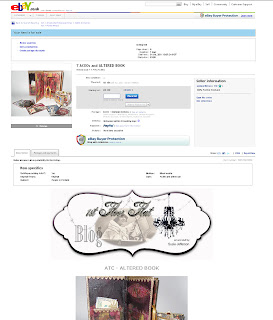
I am now able to do personalised templates for eBay shops!
On another note, I'm putting up a lot of destash goodies onto eBay (see the widget in the sidebar) and also some artwork. So I hope you'll take time to go and have a look. (i've also worked out how to do a personal template!)

pink saturday

Finally, please visit Beverly at How Sweet the Sound to see all the other wonderful Pink Saturday posts!