
First off, I'm keeping my Birthday Giveaway open over this weekend - so leave a comment here or on my previous Pink Saturday post to win a blog header or a button or blinkie, designed by moi myself!
I didn't get a lot of visiting done last weekend, as we were out most of the time, so I obviously didn't get many visitors either... so to be fair, I'm holding the giveaway open this week as well. I know I promised to announce the winner today ... well, it'll be next week instead.

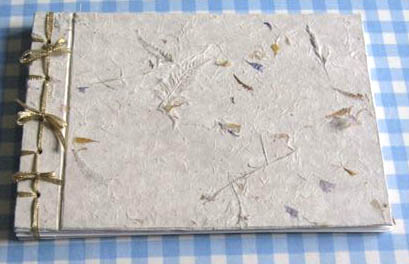
This week, I've been frantically busy (invited to teach again at the annual Gerrards Cross Summer School) so Wednesday I was teaching Japanese Stab-bound albums.


Here are a couple of the books the group made - I had 11 students, but we didn't discover we had a camera in our midst until after a few ladies had already left. So they missed out there. Brilliant, aren't they!
Cover a book box
I had a very boring Kraft papier mache book box that I keep my unmounted alphabet stamps in. It's so boring, I decided to do something with it! Then I thought it might be a good idea to share....
 |
| Boring plain Kraft papier mache box |
 |
| Heavily textured Khadi handmade paper |
 |
| I sprayed the hinges for my other book green, using the inside of this box to keep the spray away from the table, sorry! If you want to see the book, scroll down to the post before this one. |
The box is painted inside and out, the small piece is the left side lining paper and the larger ones are for the top and inside the box part - all in one piece, sides and bottom.

Side paper glued in. You'll notice a slight overlap at the bottom - making sure there are no gaps. I used ordinary PVA gle (white glue, dries clear).

The inside of the finished box. You'll note I didn't glue paper over the hinge as this is a tight-fitting lid.
 |
| A heavy application of gesso on the stamp and more repeat patterning |
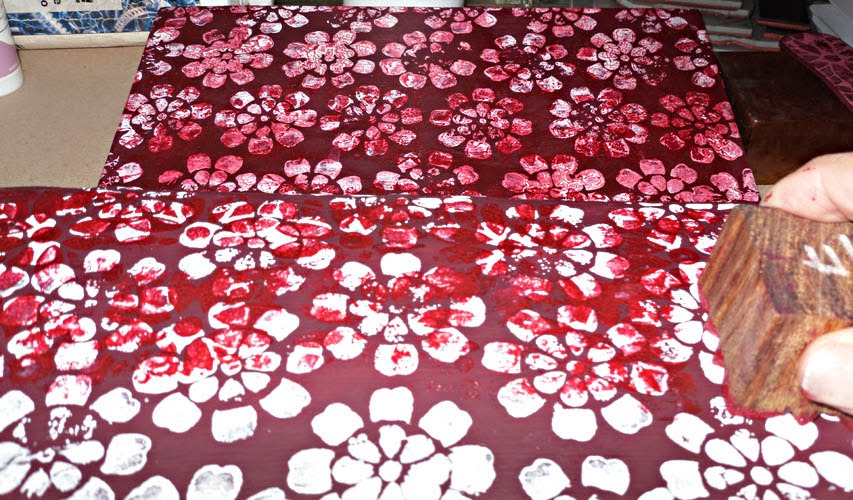
I didn't like the gesso - too stark. So I overstamped with Lumiere's Crimson (pearlised deep red) using the first block (the one I stamped on the paper for the inside of the box).

I did two rows of stamping, then blended in with a soft cloth before the acrylic was completely dry. This blended the paint a little, but still left a very dimensional broken texture.
 |
| Finished! |
 |
| Showing the fastening and 'page edges' detail |
This meant there was a little too much movement of the Grungeboard just at the fore edge, so I made another hole and added two more eyelets in the same way (you can see there's an overhanging lip, so that's where I made the hole). To finish the fastening, I punched a large hole at the end of the Grungboard, and a small hole in the side of the box - then screwed in a hitch fastener. The Grungeboard hooks over beautifully.
Why bother? I carry the box (and contents) to classes, so this stops everything falling out. Nice, neat and secure - and now a lot more interesting to look at.
My Blog of The Week has to be Colouricious's blog - some great techniques and YouTube videos there, especially if you are interested in fabric art.

Finally, please visit Beverly at How Sweet the Sound to see all the other wonderful Pink Saturday posts - and don't forget to leave a comment if you want to win that blog header & button!
No comments:
Post a Comment