Wednesday, December 31, 2008

HAPPY NEW YEAR!

Well, this is it folks!

Didn't 2008 go by quickly?


Anybody made any New Year's Resolutions?

I am making just 4...
  1. Finish off all those (how many? hundreds?) art projects cluttering up the house
  2. Join in some of the swaps on the Yahoo art groups
  3. Send in a project to a magazine or three
  4. Not feel guilty if I don't do any of the above
Here's wishing you all health, wealth and happiness in 2009.

Monday, December 29, 2008

TWO DECO LAYOUTS

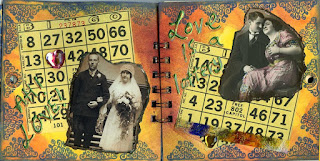
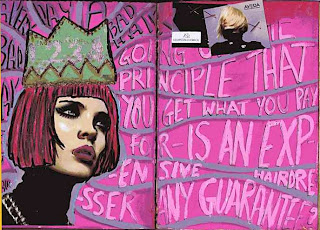
I thought you might like to see two deco book layouts I did, for the PaperArtsy swap.


Paula's book


Liz's book

These pages were each 4 inches x 4 inches, and great fun to do - using only the new PaperArtsy Squiggly Ink stamps, but apart from that, anything went re collage, embellishments etc. I used little feather butterflies, silk flowers, transparencies and just about anything I could lay my hands on.

This was my first venture into deco books. I wonder how one would classify them? Journals? Artists books? I really can't decide.

MORE BRILLIANT LINKS

I am always amazed at the links one can find online: here's the ultimate in altered books (you need to keep the sound on for this one, and linger on each page awhile):
Book of Numbers
and you just might like this one too (again, keep the sound on if you like 30s style jazz):


and also this promo clip by ShitDisco (although you might not like their music: Indie):


Clever, huh? The Book of Numbers is my favourite, though.

JOURNAL LINKS

I came across this brilliant artist - Pam Carricker - go see her Flickr gallery for even more inspiration!


This has made me feel I really need to start journaling again!

And have you checked out Teesha Moore's blog lately? The only thing about Teesha is that she has made her style so distinctive (and inspirational - I love, love, love her pages), that if you want to journal with colour and draw lines for your lettering, that you look as if you are copying her - even if you don't want to! Developing your own style is HARD.


See what I mean?

More later, guys....

POST-CHRISTMAS BLUES?

It's the Christmas aftermath... I'm feeling very flat, after all the excitement.

On the horizon: a bloody good house-clean (boring) and catching up with all the washing (also boring - although I wonder how can just 2 people create so much dirty clothing?).


My idea of housework is to sweep the room with a glance. Anon.

At least I don't do ironing any more unless I absolutely have to (I have finally stopped feeling guilty about it). There's nothing much on telly except repeats of the Christmas shows I already watched.

It's unfortunate that my guilty conscience means I have to clean house again (within an inch of its life) to welcome in the New Year, or bad luck will follow - as I did it all on Christmas Eve (for the same reason). Guilt, the legacy of good parenting, means I get to do this twice over the holiday season, and then again as soon as it looks like Spring. I don't mean the general, keep-up-with-it, you-don't-want-to-live-in-a-dump stuff... I mean the inside-the-cupboards & the tidy-up-the-underwear-drawer stuff & the floors (including behind the cooker) stuff. BORING - but necessary for an inner quiet life. I swear my conscience is noisier than Jiminy Cricket in the Pinocchio cartoon.

This is now the time to think about New Year's Resolutions.

I wonder if I should make just one - NOT to make any! This is the time for all those unrealistic ones: lose a ton of weight, exercise, moisturise regularly, really get the hang of Photoshop etc etc.

I pretty much keep up with the moisturising (I'm convinced my face will fall off if I don't). I walk to the bus stop and back (about half a mile) and carry lots of heavy shopping - so that's the exercise taken care of!

Tape transfer of magazine page


Lose the weight? Hmmm... it's not the losing, it's the keeping it off that is the hard bit. Dieters have a record of 95% recidivism; it's been proved. All I know is that I have lost and regained the same stone (14lb) over and over - and that every time I put it on, it came with the new friends it made (another 7-10lb) which always went on in flab! So now that one stone has been joined by several others, and that's all I'm admitting to!

So I may give that one a miss, although my doctor has made threatening noises about cholesterol... So MAYBE this will be the year I'll pick myself up and try to behave foodwise again (the trouble with losing weight is that you have to BELIEVE... but I don't anymore) and maybe I'll start dyeing my hair again (although the grey means I get given seats on the bus).

I'll confess all later.

Wednesday, December 24, 2008

GIFT WRAPPING SOLUTIONS

Folks, I just found this brilliant idea for wrapping your gifts, whatever time of year - especially useful today for last-minute and awkward shapes, if you ran out of paper!


Furoshiki gift wrapping from RecycleNow on Vimeo

I think this would be an idea made in heaven for fabric artists and quilters.

Happy Christmas!

Tuesday, December 23, 2008

CHRISTMAS LIGHTS

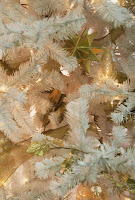
I've been messing around with my camera (not a very good one) and taken some closeups of the Christmas trees.


The green one with bronze tinsel (above) is our main one, a 6ft artificial tree.

The small one - white tinsel - (just 3ft high) is sitting on my art table.


We're suckers for Christmas lights - there are 3 sets on the large tree (2 sets of 20 bulbs, plus one of 40 bulbs) and the small tree has 2 miniature battery-operated sets (10 bulbs each).


I also managed a bundle of twigs with lights twined round them, standing in tall vase on the floor by the bookcase, and a set of Santa lights over the mirror, a set of star-shaped bulbs across the wall and another set of lights draped over the curtain rail.

We look like Santa's Grotto but I don't care! Can't have too many lights!

So here's a few pix to show off. I don't know why Christmas trees are so hard to photograph - I have tried for a couple of years now, and they just don't look as good in the pictures as they do in real life. This time, I tried closeups and I think it's worked better.

I'll admit I have fiddled with them a little: extra sharpening, added noise, to make them look more pixellated and bokeh, which is the art of blurring the focus on purpose to make the light look sparkling. I haven't quite got the hang of it yet, but am definitely going to persevere.

Merry Christmas, everyone!

USE NORAD TO TRACK SANTA!

Go to the NORAD site to download their Google Earth link, and you'll be able to track Santa's actual flight plan!


Now I've seen it all...


I saw this item on another blog (thanks so much for posting this, Sharon) and couldn't resist posting this to mine too.

Image from Tack-O-Rama's Books & Magazines link

Friday, December 19, 2008

WINTER QUOTATION


Of winter's lifeless world each tree
Now seems a perfect part

Yet each one holds Summer's secret

Deep down within its heart.

Charles G Slater

Thursday, December 18, 2008

MORE CHRISTMAS CARDS

Here's another Christmas card gallery.


I couldn't believe how many I've made over the last couple of years. There's still more tucked away somewhere!

HOMEMADE BAILEYS RECIPE

This is another alcoholic recipe - for a drink very reminiscent of Baileys Irish Cream Liqueur.


I was given this by a delightful lady who said I could reproduce it... as long as she remained anyonymous!


HOME-MADE IRISH CREAM
By Anonymous
This makes about 5 cups.

1 - 2 cups of any of the following: Whisky, Brandy, Dark Rum

1 can sweetened condensed milk (eg: Carnation) OR 2 cups home-made condensed milk recipe
Do not subsitute evaporated milk - it doesn't work!

1 cup (half pint) whipping cream

2 tablespoons chocolate syrup

1 teaspoon vanilla essence

METHOD

Whip the cream in a blender until frothy and smooth, then slowly add the condensed milk, alchohol, chocolate syrup and vanilla essence.

Blend for another 2 minutes.

Keep in the fridge and shake before serving.

HOME-MADE CONDENSED MILK RECIPE
This is equal to one can of condensed milk.

1 cup plus 2 tablespoonsful of instant dry milk powder

1 cup warm water

1 cup sugar

METHOD

Mix milk powder and water together thoroughly, and stir in a double boiler or Bain Marie (a pyrex bowl stood in a pan of simmering water) and bring to the boil.
You need to use a Bain Marie as instant milk powder boiled directly in a saucepan will curdle.

Add the sugar gradually, stirring until dissolved.

Allow to cool, then store in the fridge. Whilst stored in the fridge, the mixture thickens naturally and has a very long shelf life (months!)

Serve in your best cut crystal glasses and enjoy!

Wednesday, December 17, 2008

SOME CHRISTMAS CARDS

I thought it was high time for a little eye candy after all that chocolate! Here's a little gallery of Christmas cards past.


I have get around to scanning my latest bits & pieces - as anyone knows who had the patience to read some of the old posts, I lost a ton of stuff when I had to replace my hard drive.) These cards were all on CD backup discs, thank goodness, or you wouldn't be seeing these either!

I admit to being a bit naughty in that I posted this gallery onto the Blade Rubber blog as well, but I couldn't resist it - I've been playing with all the gadgets on Slide, and just love the special effects! Really Christmassy.

Let it snow, let it snow, let it snow
(but not too much.....)

Tuesday, December 16, 2008

HELGA'S CHOCOLATE TRUFFLES

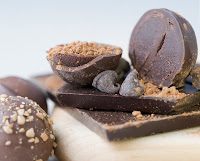
Some years ago, I hosted a recipe swap for two of the yahoo groups and begged this recipe off my friend, Helga. I have to say when I first tasted these, I thought I'd died and gone to Heaven!

This is very rich, definitely not slimming (who cares!) and can be made ahead of time and stored in your freezer until wanted. These are so gorgeous, you'd better hide them at the back of the freezer and label them "turkey remains" or something like that, or they'll disappear as soon as your back is turned!

HELGA'S CHOCOLATE TRUFFLES

200 grams good quality dark chocolate

250 grams good quality milk chocolate

1 carton double cream (half pint or 225 grams)

This quantity will make approximately 30 truffles. Use really good quality chocolate, eg: Belgian or Swiss. It really makes a difference.

Melt the dark chocolate in a double saucepan or Bain Marie (stand a pyrex bowl in a saucepan of simmering water, making sure no water splashes onto the chocolate).

Take off the heat and stir in the double cream.

Use 2 teaspoons to mould the mixture into little mounds and leave to set on greaseproof paper, baking parchment or waxed paper on a baking tray. Place in the freezer until set.

Melt the milk chocolate in the same way, then spear the truffles on cocktail sticks and dip into the milk chocolate (you can do up to 5 at the same time). Dip all the truffles and return to the freezer (again, on a tray covered with greaseproof paper, baking parchment or waxed paper).

Once set, they can be stored in an airtight plastic container until wanted.

Remove just a few minutes before serving and eat straight away.

I know you'll enjoy these!

Sunday, December 14, 2008

LETHAL SHERRY TRIFLE

This is a family recipe, but it’s me who worked out how to get a quarter to half a bottle of sherry into it!

This a celebration trifle – I only ever make it at Christmas – and usually start it the day before Christmas Eve, so there’s plenty of time for things to set.

Images from Tack-O-Rama

I have made it on Christmas Eve but it has been pushing it a bit time-wise as the larger the trifle, the longer the setting time needed. Once it’s done, just leave it in the fridge and whip the cream a couple of hours before you want to serve it (I do mine on Christmas morning) then it will sit happily in the fridge until you want it. It will keep for up to a week (although mine usually doesn’t last that long – it’s very more-ish…..). This is party size, by the way.

Ingredients:

LARGE cut glass or Pyrex bowl - minimum 4 pints (2½ litres) capacity

2 x packets Jelly or jelly crystals (Jello in the US)

1 x bottle sweet full cream sherry

1 x pack boudoir biscuits or sponge fingers

2 x tins fruit (fruit cocktail, strawberries, sliced peaches etc)

1 x tin or packet Birds Custard Powder

1 x tablespoon sugar (granulated or caster)

1 x pint (568 ml) milk (semi-skimmed or full cream)

1 x LARGE tub double cream (half pint or even more)

Glacé cherries, morello cherries or grated chocolate to decorate (optional)

NOTE: If using a precious cut glass bowl, make sure you never put hot ingredients straight into it – or it will crack. Rinse in hot water first, then keep the bowl resting on top of a towel to help absorb temperature changes, and let any hot ingredients (jelly, custard) cool down a little first.

Method:

Layer the boudoir biscuits or sponge fingers across the bottom of the bowl. If using Swiss Roll, cut into slices (½ - ¾ inch) and lay on their sides across the bottom of the bowl, and just coming up the sides a little (you can see them through the glass – pretty!)


Take your bottle of sherry, and add by sprinkling over the sponge (if it helps, keep your thumb over the neck of the bottle, so it dribbles out). Alternatively, pour the sherry into a milk jug or similar, and drizzle over the sponge layer. (The idea is to get as much sherry into the sponge as it will absorb, and you want the sherry to completely absorb into the sponge, so pouring half a bottle in at one go is not a good idea, as the sponge might disintegrate. Drizzling it in works best.)


Keep adding the sherry until you have used about one third to one half of the bottle.Meantime, you have opened your tins of fruit and drained the liquid off (RESERVE this liquid – you will use it later). Add the fruit from one tin on top of the sherry/sponge layer (I usually use about a whole tin of strawberries) and leave whilst you make up the first packet of jelly. The strawberries will absorb some of the sherry flavour.


The jelly in the UK comes either in a slab or in crystals (sugar free). Melt in a quarter of a pint of BOILING water, and stir until dissolved. Allow it to cool down and add the reserved liquid from the tin of fruit to make up to HALF a pint ONLY – this strong mix of jelly will be just enough to set all the liquid, sponge and fruit in this first layer. (Any more liquid, and you will end up with soup!). Set aside and allow to cool completely before putting into the fridge.


If you are impatient to get on with the next step, and it isn’t cooling quickly enough (NEVER put hot liquids in the fridge – especially in a cut glass bowl or it will crack) then stand the container in a pan with cold water (and even ice cubes) to bring the temperature down without diluting the liquid further.


Now leave the jelly alone, and put in the fridge until set.


Next step: The second layer of jelly.

First sprinkle the remainder of the fruit over the first layer of sponge etc. Make up the other packet of jelly (again, using only a QUARTER PINT of boiling water) and add the liquid from the tin of fruit (and cold water if necessary) only to the HALF pint level. Allow to cool down a little before pouring into your bowl. Cool for a while longer then put in the fridge to set (overnight if you can).


Adding the custard:

Make up the custard: use 2 heaped tablespoons custard powder, and mix in a bowl with one tablespoon sugar (granulated or caster). Add a little milk from one pint and mix well. Heat the rest of the milk in a saucepan.


When the milk is fairly hot (but not boiling), pour from the saucepan into the bowl with the custard/sugar mix, and stir in. Return the whole lot to the saucepan, put back on the heat and keep stirring until it comes to the boil (it will thicken considerably). Let it boil for up to half a minute, stirring all the time, then remove from the heat to cool.


How to cool custard without a skin forming

Whether you like to pour the custard into a jug first, or prefer to let it cool in the pan, put a piece of Clingfilm straight onto the surface of the hot custard and press gently down on top of the custard, working from the middle to the sides. This gets rid of any air bubbles, and prevents a skin from forming. Do this immediately you take the custard off the heat. As soon as it has cooled down enough (say 15 minutes) remove the clingfilm and pour the custard over the trifle. Apply more clingfilm over the top then put in the fridge to set.


And finally, folks:

Take the double cream (at least half a pint – more if you want) and put in half a teaspoon of sugar. This helps it when you are beating it. You don’t want to sweeten (you have enough tastes in there) but you do want it to hold peaks.


Whip with an electric beater, and when it has doubled in volume and holds its peaks, spread carefully over the trifle using a palette knife or fork to make pretty swirls and patterns. Add a little at a time, starting at the centre and working out towards the edges (so you don’t add too much weight at any one spot, and won’t break the surface of the set custard). Add a little grated chocolate, or cherries cut in half, to decorate.


DISCLAIMER
You know this is alcoholic, so don't drive or operate machinery, etc etc.

Having said that - hope you enjoy it!
HOT TODDY PIC

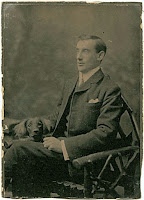
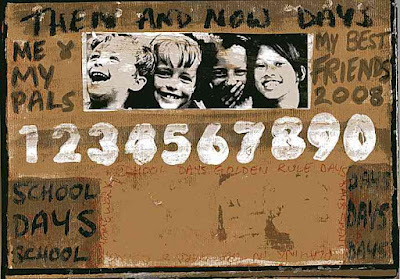
I finished that photoshop course (2 hours each Friday for 4 weeks) so feel a little more confident about messing with layers. Here is one of my first attempts - an old cabinet card with sunlight effect at top left; the image was sharpened, lightened and posterised, then I added text.

For a READABLE hot toddy recipe, look at the post below.

This was fun! In time, I will improve...

Wednesday, December 10, 2008

HOT TODDY RECIPE


Here's a great recipe for a hot toddy, originated by my father (who used to swear by it). He suffered badly with bronchitis, and I've just got over flu - and it certainly worked for me! I slept like a log.


My friend Chris's Grandfather - copyright-free photo which you may copy for personal use only (with Chris's permission). If anyone uses this for a piece of artwork it would be great to see a copy - I'll post the pic up on the blog.

DAD'S HOT TODDY

  • Juice of half a lemon
  • 1 dessertspoonful of runny honey (or more, to taste)
  • Generous slug of whisky or brandy or dark rum
  • Hot water
Place lemon juice, honey and alcohol in a glass and top up with the hot water (boiled, and allowed to cool down a little as you don't want to destroy the Vitamin C).

DISCLAIMER
This is very alcoholic, so don't drive or operate machinery, etc etc.

Hope you are feeling better now!

Monday, December 8, 2008

WINTER BLUES

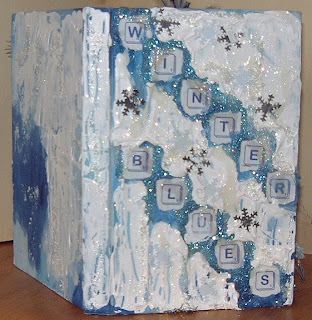
As it's now officially Winter... and very nearly Christmas... I thought I'd upload this little gallery of artwork I did in Brenda Renoulf's altered book Winter Blues.


Gel medium and extra glitter, plus torn papers, a torn hole in the page with a spiderweb sewn in over the hole (using fibres and textured wool) plus metal confetti and eyelets.


In hindsight, I wish I had scanned the pic of the little girl; she's fabulous. It was a magazine page I have hoarded for several years, and now can't even remember the mag, or I'd buy it again.


Brenda had already applied the letters, and allowed me to add my embellishment around them: heavily-applied gesso (using a palette knife) blue glass beads, glitter, Diamond Glaze and more metal confetti.


I got to do the very last spreads for this swap, and also the cover, finishing the book.


The page before the little girl, showing a torn pocket on the left with an ATC tucked inside, and the torn holes with spiderweb effect (darned with wool fibres) plus heavy application of gesso, Diamond Glaze and glitter (and a few eyelets thrown on for luck).


Closeup of the pocket page without the ATC.


Front and back views of the ATC, with lots of German Scrap around the edges. The actual artwork is a cheat - I used stickers! (they were so sweet, I couldn't help myself) and glazed with tons of Diamond Glaze ... and yes, more glitter!


I hope this is putting you in the mood for Christmas!

Sunday, December 7, 2008

SU BLACKWELL

I just came across a link for this fabulous artist: Su Blackwell.


The Twelve Dancing Princesses


Margaret & Marjorie

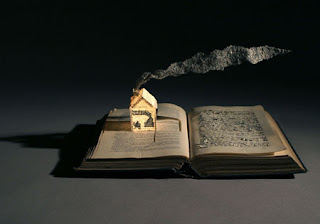
She sculpts in paper and currently has an exhibition (until 20th December) so if you can, hurry along and see it. I intend to!


Alice - A Mad Tea Party

These are so delicate, intricate, really exceptional - even just looking at the photos blows me away, so I know seeing it all For Real is going to be incredible.


Naturally, Su is now added into my Links. I just know you'd enjoy this exceptional eye candy!

Thursday, December 4, 2008

GO GET YOURSELF A SNOWFLAKE!


Now it's getting cold and snowy, it's time to get your own personal snowflake from SnowDays (free, fun and very lovely). If you search hard, you just might see mine there!

And as promised, a little piece of artwork (for a change...)

Thursday, November 20, 2008

FONT FRENZY, SYSTEM RESTORE POINTS etc

Hi gang

I bet you didn't know that if you have too many fonts on your system, it can start behaving very strangely....

I've been using FontFrenzy, a free programme, which I think is totally brilliant.

What it does is to move all those boring and unnecessary fonts that are originally installed with your computer. These go into another folder - I FontFrenzied mine and ended up with 61 (some of which are really boring to look at, but necessary in the running of the machine) which was a whole lot better than the 752 which I ended up with when I had finished reloading the computer with the CD label maker, Photoshop, my web design programme and my desktop publishing programme. FontFrenzy takes a snapshot of all the fonts in your sytem, moves them and then you can ReFrenzy at any time you want to reinstall them. You can also adjust the size so that you can actually SEE what your fonts look like.


Some systems don't like FontFrenzy. Mine doesn't like the latest edition (link above) since I put in the new hard drive.

I do advise you to try this one (above) first as it doesn't have a nag screen. I run Windows XP Pro and it kept trying to download all the folders onto my Desktop. Windows Service Pack 3 can also affect it. If your system doesn't like it, simply re-run the programme to disinstall it.

However, being me, I was
determined to get the programme again (I can't live without it) and found an older version: FontFrenzy1 This worked perfectly for me. The only drawback is that this version has a nag screen.

I also like to use another free programme, AMP Font Viewer, to organise my fonts. The icon sits on the Desktop. Double click this to bring up the programme - and why I love it is this: it shows you all the fonts you have loaded, and behind this is a tab to show you all the fonts you don't have loaded! So all you have to do is browse, to point the programme in the right direction (eg: the FontFrenzy Fonts folder) which displays all your fonts (again, you can readjust the size so you can actually see what they look like) and you can install temporarily, just for that one use, or permanently. So I can zip through all my fonts, upload all the fancy ones my heart desires, and then dump them again by DeFrenzy-ing with FontFrenzy. I love to download any new freebies that take my fancy, and this means I don't overload the machine and slow it down.

I have now spent a little time creating a new folder in My Documents, and labelled it FONTSfolder. I then created more folders under this heading, so my sub folders are called things like Dingbats, OldFashionedScripts, ModernScripts, Typwriter, Grunge etc. I then copied fonts from the Font Frenzy Fonts folder into the various categories (although you can also do this via FrenzyMan, right in the programme). The reason I used AMP Fonts Viewer to do this is that I now also download all my freebie fonts right onto my Desktop, unzip them using another brilliant freebie: JustZIPit and drag-and-drop them straight into category in My Documents. So I can dip into them as I wish (and it saves DeFrenzy-ing them all and reinstalliny my favourite fonts).

If you have masses you have collected, this is a quick way to organise them all. It's a good idea to do a backup CD so that you have all your weird & wonderful, can't-remember-where-I-got-them-from fonts all in one place. I have various free CDs with fonts on that came with scrapbooking and computer magazines: again, it's worth going through these and saving your favourites, then you can dump all those discs and do even more decluttering.

IMPORTANT: BEFORE YOU DO ANYTHING HOW TO CREATE A SYSTEM RESTORE POINT

Before you make any major changes to your computer, especially if you aren't very confident, it's always a good idea to make a System Restore Point. If you have a computer manual, read up how to do it... or trust me and follow my instructions below (which should be pretty much the same for any PC).

WHY BOTHER WITH ALL THIS STUFF?

The reason you should do it is that if you have made a mess of installing FontFrenzy or any other programme, or moved your fonts and made a mess of it, etc - you can reverse it using System Restore, so it's like nothing ever happened! However, you can't use System Restore until you have created a System Restore point as your computer won't have anything to restore to!


To create a System Restore Point, click on your Start button (bottom left-hand corner of your computer screen) then click Accessories, System Tools then System Restore. You'll see two buttons, the top one is System Restore, and the lower one - which is the one we want right now - is called Create a Restore Point. Click on this and type something in the box (eg: FontFrenzy & AMP Font View installed). Click on Create, then click on Close. That's it!

To use System Restore, go to Start, Accessories, System Tools, System Restore, then System Restore which restores your computer to an earlier time. You'll see a little calendar - some of the dates are bold. These are system restore points. Click on one of these (it might be an automatic Restore Point, which your system does from time to time, or it might be one you labelled yourself, eg: New Printer). Click on the one you want, click OK and let the computer do the rest. It will take some time, all the desktop will disappear, the screen will go black, etc, then it will reboot with a little box telling you if the Restore was successful or not. Click OK if it was, and everything will be back to normal!

I bet you feel loads better now!

Thursday, November 6, 2008

BACK UP & RUNNING!

Well, gang - it's been a while...

I am very happy to say I am finally up and running again. It's been a long hard slog and a very steep learning curve.

However, armed with strong cups of coffee


and therefore alert as possible (virtually hyper: you could have scraped me off the ceiling!) I mentally girded my loins, took a very deep breath, tried not to whimper - and went for it!

Suffice to say: the computer now has a new hard drive, more memory (1GB) and a brand new super powered graphics card - all put in by me with my own hands! Plus I was also stuck on the end of the phone for nearly an hour, having to reconfigure the actual hardrive itself - lots of black screen with white letters and numbers scrolling across, then actually typing in the actual commands to make the thing work. THEN another 3 hours feeding in the programming discs. I hope I never have to do it again in this lifetime!

I am now finally able to slowly load up all my stuff, and the machine does seem to be behaving better (you can tell I'm being cautiously optimistic...)

One regret - I totally love Font Frenzy (see Geeks R Us links on the right) as it takes out all the fonts except the ones the computer actually needs to run - and puts these all into another folder. Which meant I could happily download all my fave grunge fonts, and get at them at any time. So thanks to Windows Update forcibly putting patches etc onto the machine, I now have Windows Service Pack 3 - which has rendered the Font Frenzy unuseable. If I hadn't gone through all this agony and spent days loading stuff back on, I'd be tempted to wipe the machine down again just so I could keep it. Hopefully, Sound Ministries will write an update and then I can happily go on using it. Waaah.

DID YOU KNOW - if you have too many fonts installed right into your Fonts folder on your computer, that it can render the machine a little unstable. Try to keep it down to 300 if you can! (Now you know why I love Font Frenzy - I'm addicted, and keep dowloading all these freebie ones, and had over 600). So if you have too many fonts, you might want to transfer them into another folder elsewhere, and just load them in when you actually need to use them.

Anyhow, now I am back in some sort of order, I'll catch up on posting the life drawing classes - these pix are backing up! Incidentally, I have now done 2 sessions of the Photoshop course, so you might start seeing better pictures in the next couple of weeks. I am still trying to get my head around Raster and Vector layers. As they said in Airplane the movie, "What's the vector, Victor?"

See ya.
B&Whotos from Tack-o-Rama (see Links) and typewriter pic my original photograph

Friday, October 17, 2008

MORE BLOODY COMPUTER WOES

Image from Tack-o-rama (see Links, right)

Rats and double rats - the computer is still not fixed. The technician came Wednesday as promised (a miracle in itself) and pronounced the computer not very well at all. So the new hard drive was delivered yesterday (!) by DHL, but I am still awaiting the discs without which the hard drive cannot be programmed as my reboot disc is also corrupt. Oh joy. And now I have to depend on the postal system...

So fingers & toes crossed that the discs arrive tomorrow and then Sunday I will be attempting to replace my very first hard drive (Himself not being very good at the electrical side of things, and also one of Those Men Who Do Not Read Instruction Manuals).

Meantime, although the hard drive and discs are being paid for by the insurance, I have had to buy new memory myself (1GB) as every security programme uploaded takes its memory from the same area as Windows - so although my computer tells me I have 85% unused area, it's obviously not in the same place as all my other stuff, as Windows keeps telling me I am out of Virtual Memory. So what DO people load up? Tons of Excel documents? You can bet Bill Gates made sure there'd be plenty of room for geeky stuff and accounts stuff and other unnecessary (to me) rubbish.

The technician also told me I don't have enough graphics capability - I am not a gamer, and apparently most of the graphics capacity is aimed here, and not towards photos, artwork etc. Which means I have had to buy a graphics card - and now have to find out where to insert it (don't tempt me...) as this one has to go in some slot in the motherboard. The other option being not to have many photos or fonts on the computer - which is what I mainly work in.

So the next question is, if I have a hard drive, what is a motherboard, and what relation is it to the hard drive? I take it they are not one and the same thing.

Oh for the days when I worked in an office and the nice young IT man down the corridor used to come and change the toner cartridge for me, and all was magically updated overnight without my lifting a finger... It's all a very steep learning curve I could well do WITHOUT. And all due to some smart little shit with nothing better to do than send out computer viruses as a "joke". I got a Trojan back in May which has permanently damaged the machine, and this is the result.

Still, I managed to replace the modem on my old computer when it got fried in a lightning strike (luckily for me, I had the windows open at the time - the lightning flashed right through the living room - we are right next to a telephone post). I was on the phone at the time, and it went ZZZZZPT. Luckily I dropped the phone at the time or you might not be reading this post... Suffice to say, I replaced the modem (it took a couple of tries as they had sent the wrong one, which explained why it wouldn't fit) not that it was because I was female. Thankfully, things seem to have moved on a little, and I am not encountering so much prejudice when I shop in Maplins for computer-related bits & bobs. So I will certainly be giving this my bestest shot.

SO... once the hard drive has been replaced and I have reloaded the programmes, I will then be able to load up Week 3 Life Class drawings. I'll keep you posted!

Saturday, October 11, 2008

COMPUTER WOES

I'm in a down mood tonight - the usual: the stupid computer is playing up again. So I feel like this (left).


I'm of an age where I shouldn't sulk or scream. As an adult rational being I should be able to cope with this calmly and serenely.

Whereas I feel more like chewing the carpet - or seeing whether the damn machine can swim (after I use a sledgehammer....)

After numerous phone calls, the tecchie guys have decided that although I am but a feeble brainless female who can't tell a jpg from a url, that the machine isn't behaving properly and may actually have a fault! So finally it looks like the very expensive extended insurance may pay off - I am actually getting a Personal Visit from a Technician on Wednesday. Which might actually fix the problem - the machine needs reformatting (ie: wiping the memory off completely and reprogramming from scratch) and guess what? They don't give you reboot discs, only recovery discs - so I can't do this myself. And they now think the recovery disc is probably corrupt anyway! Oh joy....

I'll put it this way... if this doesn't fix it, never mind the 2 years the insurance still has to run, this machine is out the window and I'm going shopping! Watch this space.

Aaaaargh!

Thursday, October 9, 2008

LIFE DRAWING CLASS: WEEK 2

WARNING: IF YOU FIND THAT NUDE IMAGES OFFEND, DON'T LOOK!

As promised, here are the last sketches for Week 2 of my life drawing class. These are both of Suzanne, on A1 size paper with a soft, dark brown chalk pastel. Fixative was cheap hair spray! (I bought Tesco's Own unscented, the theory being that if it's cheap it is also unscented, won't have conditioners etc, so will basically just be a coating.)

Both poses were completed in the one 40-minute session - I think around 25 minutes for the first one, which is more "finished".


This pose took around 10 minutes - I didn't get to finish in the time, which I am sorry about! You can see I had started with the shoulders set too high, and managed to adjust this before the session ended - but I would have liked to flesh the sketch out a little more.


Watch this space next week - it's another male model!

Each week, we leave the afternoon's work for the teacher to critique, so I have to wait until the next Tuesday before I get the previous week's work to take home. I think this is a ploy to stop us all either:
a) fiddling with it and perhaps spoiling it, OR
b) thinking it's totally awful and then binning it!

Actually, when I look at the previous week, I don't think it's as bad as my initial impressions - which gives me the courage and impetus to keep on. And post the work for you to see, unretouched and Warts & All, which I think is the best. I noticed in the course print-out that we are listed to do a complete painting... should be very interesting! I think I have a spot earmarked - a fairly large patch of bedroom wall - but it all depends on the model and the pose of course. And whether I could stand looking at it first thing of a morning (I am so NOT a morning person...)

Wednesday, October 8, 2008

LIFE DRAWING CLASS: WEEKS 1 & 2

WARNING - BEFORE YOU LOOK AT THE SLIDE SHOW, THIS CONTAINS NUDE IMAGES.

Maybe some of you remember my mentioning I wanted to sharpen up my drawing skills, as I haven't "drawn properly" for quite a few years! So I signed up for a short course at our local Adult Education Centre: one 3-hour session once a week for 10 weeks, and I have to say I am enjoying it hugely.


It was pretty scary, as I hadn't drawn for so long... but it soon came back! I started off drawing A3, then A2 and am now on full parent-sized A1 size sheets. It looks like I can't draw small! Each week, we have to leave the drawings for the teacher to critique, so I only just got these back otherwise I would have loaded them up earlier!

All the sketches are entirely unretouched, so you are seeing them exactly as I drew them, mistakes and all.


WEEK 1:

Studies 1 - 4 are of Ken, a 70-year old man, who was stooped, balding, with an endearingly squashy tummy. The first two sketches (001) are warm-up studies, each pose taking 5 minutes. The next two (002 & 003) show Ken sitting in a chair. Each pose took 15-20 minutes, and were drawn with black crayon. The next (004) is a back view using watercolour crayon, dampened down with a wet paintbrush, 10 minutes.

WEEK 2:

The model was Suzanne. The first pose (005) was a 5-minute warm-up study in pencil, and the next one (006) was drawn with dark brown chalk pastel. This one took around 15 minutes. Both these were on A2 paper.

I will load some more (the light was too bad to photograph the drawings properly - they are so huge, I had to stick them up on the back of the bedroom door). I think I can definitely see some progress!

Until tomorrow...