Wednesday, November 23, 2011

SNOWMAN CONFIGURATION BOX

Snowman box - lit up
Here's my Snowman Configuration Box, all lit up. 

Snowman - detail
This one's more for the kiddies, with lots of snow, a snowball under his feet, prezzies... and white bobble braid (more snowballs anyone?)

Detail - little bottles spelling 'Joy', and another bottle with Christmas Cheer spilling out of it (and some more prezzies at the side
Fun, huh?

Friday, November 11, 2011

PINK SATURDAY - GETTING READY FOR CHRISTMAS

My 'NOEL' Configuration box - I'm teaching this next week at Blade Rubber Stamps!
I know it's early, but if you're making your own decorations you really need to start NOW!

My excuse (not that I needed one) is that I'm also teaching a couple of classes shortly, so of course I've got to make my samples. I'm totally in the mood, and can't wait to put up all our decorations on 1st December. So... if you want to make some too (or overhaul the ones you already have) here's some inspiration.

My own wreath, for my Christmas Decorations Special class at Blade Rubber Stamps
Closeup of my wreath for the Christmas Decoration Special class.

The secret with wreaths (and any decoration, really) is lots of dimension, lots of glitz and glitter, lots of reflective surfaces and lots of colour. And lots of lights.

My 'NOEL' box - closeup - unlit
My 'NOEL' configuration box - closeup - lit up (including a little LED light up the skirt of the blown glass angel on top)
The box unlit, in daylight
All lit up for the evening
Closeup of the tree, the other lights and the German glass glitter - this tarnishes a little over time, adding to the atmosphere of the piece
Of course these rules can be broken: white on white, shabby chic, matt surfaces played off against glossy surfaces... don't take it all too seriously though -  it's supposed to be fun after all! If you don't have fun with your decorating, it show!
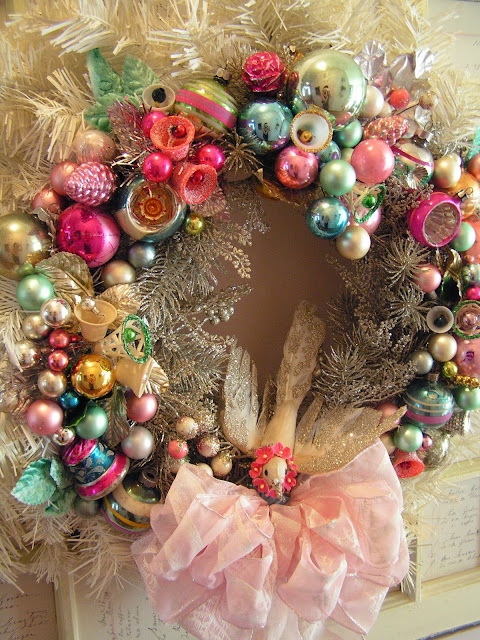
White wreath, pink ribbons and the sweetest little bird - wish I knew who made it! If it's YOU, please let me know
Off pinterest
Copyright HappyDotMom - click this link for the tutorial

Above is some inspiration I've seen online - I am crediting where I can (I lost a lot of my links when my old computer died) so if this is yours, and not credited and linked to you, please let me know so I can give credit where it's due!

Copyright Michele Kovak - tutorial here
I adore the cupcake ornament/place setting above - and can see this will adapt very nicely for snowball ornaments too.

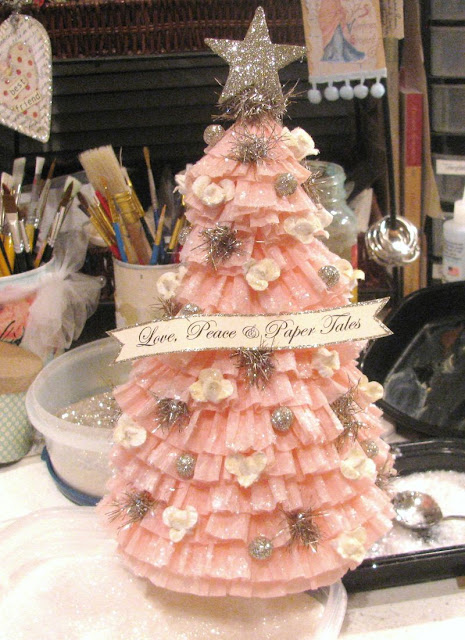
Copyright Karina Guirre at Creative Chaos
Above is the ultimate in do-it-yourself trees by Karin at Creative Chaos - I absolutely adore it.  A wonderful confection of crepe paper, tinsel and glittery balls (with a touch of artificial snow) her tutorial is here.

Finally, below is another wonderful display - with and without lights, adapting ornaments you probably already have.

Copyright Sandi for Christmas Pudding
Copyright Sandi at Christmas Pudding - all lit up with LED lights nestling in the foliage
These images are copyright Sandi at Rose Chintz Cottage (who we all know and love)  - who also has this other wonderful blog: Christmas Pudding.As you can tell, I'm highly recommending using lights whenever and wherever possible.

For my freebie Vintage Robins background and header set, go here

Have you noticed Sandi's using my freebie Vintage Robins blog background on her Christmas Pudding blog?

pink saturday

Finally, please visit Beverly at How Sweet the Sound to see all the other wonderful Pink Saturday posts!

Wednesday, November 9, 2011

ART SPACE MAKEOVER PHASE 2 - IT ALWAYS GETS WORSE BEFORE IT GETS BETTER

Even more stuff over by the fireplace. The computer area to the right (other end of sofa just showing in the photo) is reached by stepping VERY carefully.
So far so good. It seems to be a universal law that everything always looks worse before it gets better when you're trying to do any kind of makeover. All that stuff has to get pulled out before you can put it back again.
The computer area (sofa to the right, fire to the left). Sorry about the blurry picture - my elbow jerked. As you can see, more piles of stuff (and I'd tidied this at the weekend). Sometimes, I despair...
SO: much moving of stuff - and I've found I'm my own worst enemy, moving something only to find I'm in my own way again. I spend much of my time moving one heap of stuff to another area, then having to move it again as it's just where I want to put something else. Very frustrating!

First coat of paint, applied with a foam brush
The tabletop is a huge piece of MDF we had cut to size, and I used it as it was - brown and impossible to see if there was any dust or glitter on it. So much use of scrap paper (which meant keeping a pile of scrap paper close to hand - more clutter).

Magic or what? Some change, eh? I'm very pleased with it - AND I didn't drip on the carpet.

So I turned it over to the clean side, and gave it two coats of watered down emulsion paint (left over cream from the walls) diluted 50:50 to the consistency of single cream.

I then gave it two coats of Klear to protect it. Can't believe how it's brightened that corner! Plus I can see any debris. And wipe it clean.

We're getting there... more photos tomorrow if I can find the charger for the camera (been looking for 2 days!)

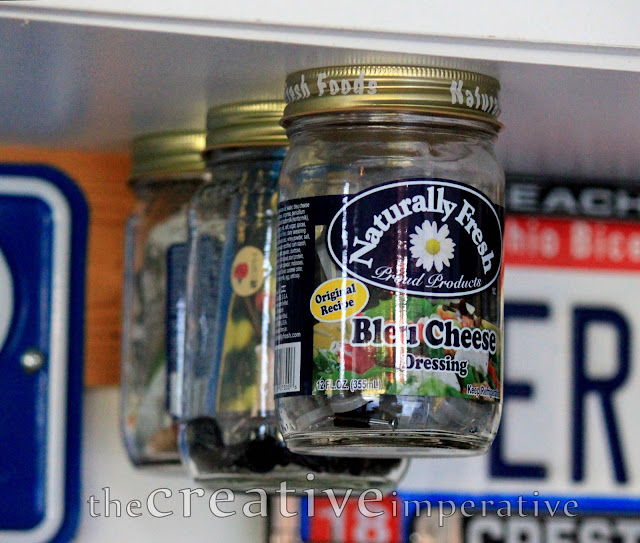
INTERIM - STORAGE IDEA

Copyright Jamie at TheCreativeImperative

Just saw this on The Creative Imperative blog - a great idea for kitchens but also for studios! Tutorial is here.

If only I had higher shelves (Himself has really put his foot down re more shelving. He knows it would be creeping up towards the ceiling - and it IS a living room, and he does live here too...).

I would think it needs double the height of the jar plus a couple of inches for clearance. Great idea though!

Tuesday, November 8, 2011

ART SPACE MAKEOVER PHASE 1 - THE 'BEFORE'

View of my entire desk area, crammed into the corner (door into hallway is on the right) with a trolley positioned at the end of the table top. Plus a lot of stuff on the trolley, under the trolley, next to the trolley, creeping across the floor...
I'm very ashamed to admit it - I've actually got to the point where I can't stand it any more - my art space is such a mess I can't find anything, and I just can't WORK!

Closer view - see how cluttered the desk actually is? I'm trying to finish my Christmas Configuration box here, and everthing is awash with extremely itchy glitter (did I tell you I'm allergic to dust?)
The main problem is that I'm extremely restricted for space as I work in the living room - at one end - with computer area at the other end, and the sofa and TV etc in the middle. And my poor long-suffering husband finally said enough was enough. And he's actually right - it was getting so out of hand I really didn't know where to start.
View from a slightly different angle. This window is tiny, and in what used to be a long and narrow hallway before this section of the hallway became integrated with the living room, and the door moved. At least I have some good natural light coming from the left.
The left side of the desk, next to the wall and under the window. I'm in the corner of the room (the dark brown you can see on the far left of the picture is our sofa, with the back of my art chair facing the arm). I've crammed in 3 Ikea wood shelf-storage thingies, plus a little bamboo shelf unit (from a junkshop) which needed a good wash. I sprayed it white.
The kneehole section under the desk. Can't even get my feet in there (which is why my chair is jammed up against the arm of the sofa).  I have to stretch and reach over to get at anything. I've got one of those rubber-backed scrubbable mats under the work area to try to keep paint drips etc under some sort of control.
The other end of the room. There's actually a rather nice fireplace and some bookcases under all the mess.
So I'm being really brave and showing you the 'Before'. You'll see the 'During' and the 'After' over the next couple of posts.