
Copyright Roben-Marie Smith for Stampington
The big secret is walnut ink. I have some of that! (Been unused at the back of a drawer for around 3 years, so I'm finally going to get some use out of it, hooray!). I also like her little touches of velvet leaves etc.

Here are the other two projects, each very different, featuring the same basic canvas bag. Aren't they brilliant!
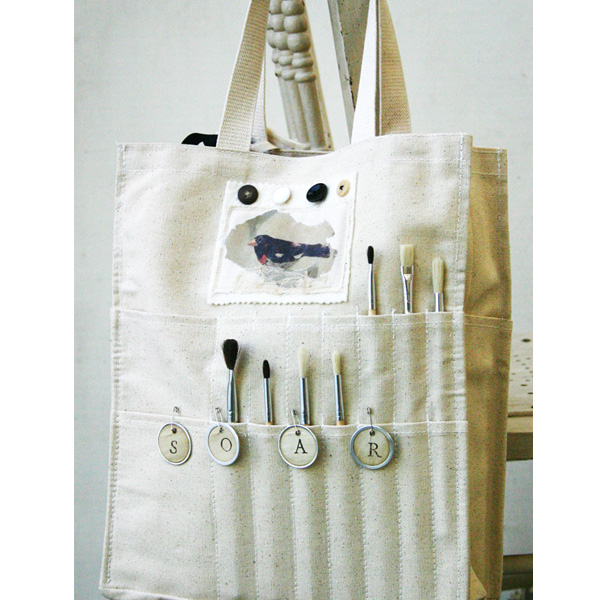
SOAR
by Becky Shander

Copyright Becky Shander for Stampington
DIRECTIONS
Begin by transferring images of birds onto canvas fabric. To create image transfers make a color copy of the images you’d like to transfer. (I use the copy machines at Staples to make my copies.) Before printing each copy, select the reverse copy option and adjust the image size accordingly.) Cut around the photocopy image and use a sponge brush to spread gel medium (Golden, regular matte formula) onto the image. Then flip the image over and press it onto the canvas. Use a brayer over the back of this image to make sure that there’s enough contact between the photocopy image and canvas. Then allow the gel medium to dry. Once the gel medium is dry, peel off the paper. Your image should be transferred. If the paper is difficult to remove, apply a water-dampened sponge over the image and let it sit for a few minutes. Then use your finger tips to gently rub off the excess paper. Allow the canvas with the transferred image to dry.
To create my black, white and red bird patch use scissors to trim around the bird images into a rectangle. Cut a small piece of lace scrap to fit along the bottom of the bird and sew to attach. Cut a piece of organic cotton batting slightly larger than the canvas with the bird image. Then place the canvas rectangle with the bird image on top of the batting and arrange color coordinated buttons across the top. When you’re happy with the button placements, temporarily remove them and sew the canvas with the bird image onto the batting. Then hand stitch the buttons to the batting. Use an embroidery needle with thread to add a French knot detail to the bird’s eye. Use pinking shears to trim around the top and bottom edges of the batting. Apply craft glue to the back of this batting patch and adhere it to the tote.
Use Staz-On ink to stamp letters (ex. s, o, a, r) onto tea-dyed office supply tags. Attach the tags to the tote using mini-safety pins.
For the “search” patch, cut a piece of canvas into an elongated rectangle shape. Then cut a piece of organic cotton batting and a piece of vintage striped fabric to fit under the canvas. Use letter stamps and Staz-On ink to stamp a word (ex. s, e, a, r, c, h), then use pinking shears to trim around the edges. Sew this canvas along the edges and on top of the batting (be sure to leave space at the top of the batting for a row of buttons.) Hand stitch the buttons on to the batting. To finish this patch, sew the batting to the striped fabric along the edges. Apply craft glue to the back of this batting patch and adhere it to the tote.
For the mini-batting patch (for the tote handle), trim around the transferred bird image. Then cut organic cotton batting, canvas and tea-dyed used dryer sheet into rectangle shapes. Place the bird image on top of the canvas and dryer sheet and sew it around the edges to attach. Next, cut a piece of fabric tape measure to fit across the canvas and dryer sheet, and embroider stitch an “x.” Place the tape measure on top of the canvas and tea-dyed used dryer sheet (under the bird image, and leave some space for a lace scrap nest) and sew it around the edges to attach. Attach the canvas fabric to the top of the batting base by sewing along the outside edges. For the nest, cut tiny pieces of antique lace and adhere them to the bottom of the bird using craft glue. Lastly, use a safety pin to attach this patch along with color-coordinated ribbons to the tote handle. As a bonus, this mini-bird patch can be used as a bookmark.
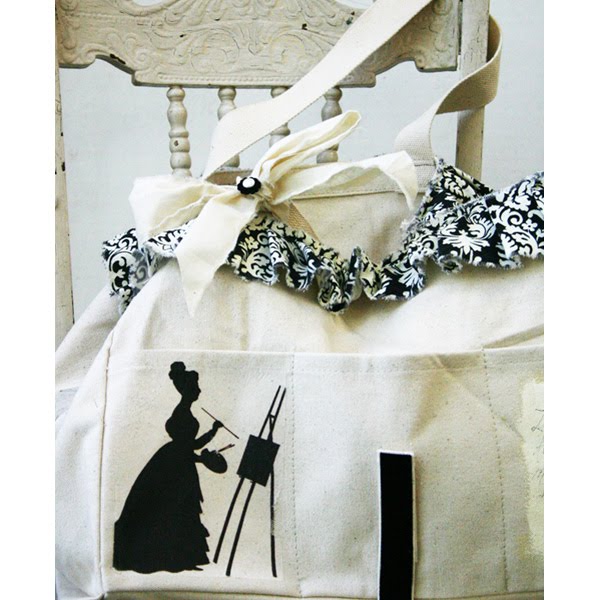
A Delightful Bag of Creativity
by Kristen Robinson
Copyright Kristen Robinson for Stampington
DIRECTIONS
1. Begin by printing the silhouette onto either muslin or iron paper and set aside to dry per manufacturer’s instructions.
2. Using your sewing machine or hand stitching, attach printed fabric to the top of the bag; gathering as you feed the fabric through the machine. Using a straight stitch as well as a heavy thread will insure the fabric will remain in place nicely.
3. Cut or tear out a piece of your printed fabric measuring roughly 5x5. To the top of this add a piece of muslin that has the word delight printed on to it or stamped on to it. Embellish with a strip of trim. Sew this to the center of the bag on the back side.
4. To the sides of the bag stamp an image or scroll using StazOn Ink.
5. Iron on or sew on the silhouette image to the pocket.
6. To the top of the Velcro (which holds the bottom closed) either sew or glue with a piece of velvet ribbon over the top of it.
7. Onto the left hand pocket of the bag add a layer of white and crème acrylic paint that has been mixed together. It is a good idea to place a piece of cardboard or heavy cardstock within the pocket as this will protect the inside fabric.
8. Using a piece of torn muslin created a bow that will be placed on one of the bags handles. Add a favorite button to the top.
9. Finally add a bit of journaling to the painted area you created.
For full details of all products used, check out Stampington's website.
Aren't these seriously fabulous! And not that hard...
No comments:
Post a Comment