Showing posts with label Colouricious. Show all posts

Sunday, May 1, 2011

MY NEW VIDEOS - FOR COLOURICIOUS


Just before Christmas, I was over at my friend Jamie's house, having a play day, and Jamie photographed my process using wooden print blocks. So here are the videos! 

If you want to see the how-to for the pink box, here's the tutorial I did earlier.

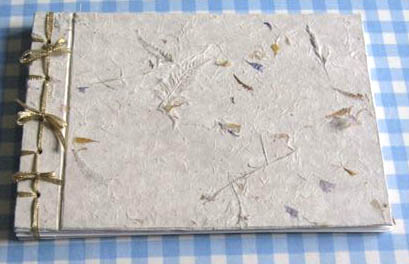
This one is a tutorial for a simple 3-hole pamphlet bound book. You'll see I also created all the pages, so the book is complete - all it needs is a bit of journalling. As I used acrylics (which dry waterproof) the pages are safe to collage, paint, glue, distress...


When doing the stitching, start at the centre hole (from the inside or outside of the book, your choice) then go up to the next hole. Bring the thread down to the last hole (missing out the centre hole) and then finish off by stitching through that centre hole again. Postion the thread so one end is one either side of the length of thread you just stitched, and tie off by trapping that central thread between the two ends. Use a square or Reef knot (right over left, left over right) and trim close to the knot. Press down on the knot with a bone folder to flatten. That's it!

Jamie is the brains behind Colouricious - if you haven't seen their excellent YouTube videos and craft DVDs, you are really missing something!

Here, I was using acrylics and gesso - just make sure you clean your blocks or stamps continuously, because once this stuff dries, it's permanent. (I plonk mine image-side down on a damp flannel, sponge, wad of kitchen paper, to keep the surface moist till I'm ready to clean up.)

Friday, August 6, 2010

PINK SATURDAY - BOOKS, PROJECT & GIVEAWAY (CONTINUED)


First off, I'm keeping my Birthday Giveaway open over this weekend - so leave a comment here or on my previous Pink Saturday post to win a blog header or a button or blinkie, designed by moi myself! 

I didn't get a lot of visiting done last weekend, as we were out most of the time, so I obviously didn't get many visitors either... so to be fair, I'm holding the giveaway open this week as well. I know I promised to announce the winner today ... well, it'll be next week instead.


This week, I've been frantically busy (invited to teach again at the annual Gerrards Cross Summer School) so Wednesday I was teaching Japanese Stab-bound albums.


Here are a couple of the books the group made - I had 11 students, but we didn't discover we had a camera in our midst until after a few ladies had already left. So they missed out there. Brilliant, aren't they!

Cover a book box

I had a very boring Kraft papier mache book box that I keep my unmounted alphabet stamps in. It's so boring, I decided to do something with it! Then I thought it might be a good idea to share....

Boring plain Kraft papier mache box
I prepped the box inside and out with burgundy acrylic paint. I lined it with Khadi paper (heavily textured, handmade) in a strong pink which I overstamped with more burgundy paint and my toys: hand carved wooden blocks from Colouricious.

Heavily textured Khadi handmade paper
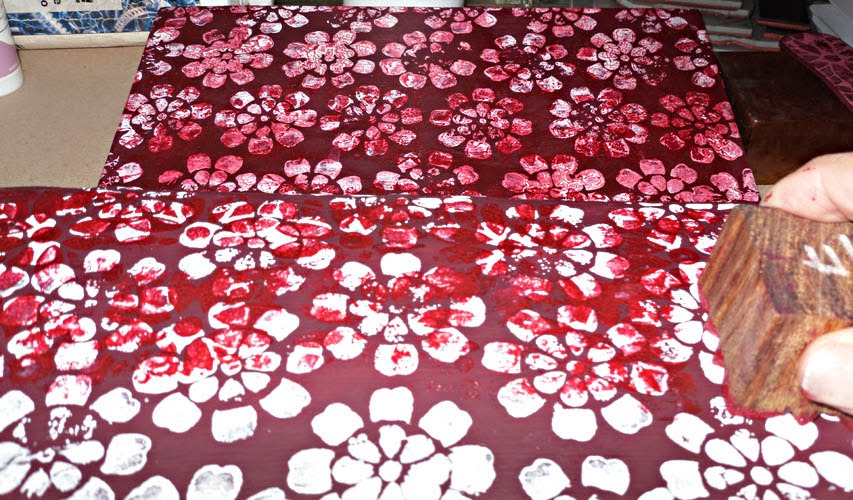
The paint was applied to the block with a sponge brush, and you can see the very simple repeat pattern: from the left, just stamped from top to bottom. 2nd from left, pattern dropped half a repeat down, 3rd from left starting at the top again, etc. Due to the heavy texture of the paper, the pattern didn't stamp perfectly - enhancing the handmade effect. (If you want a perfect repeat, use smooth paper).

I sprayed the hinges for my other book green, using the inside of this box to keep the spray away from the table, sorry! If you want to see the book, scroll down to the post before this one.

The box is painted inside and out, the small piece is the left side lining paper and the larger ones are for the top and inside the box part - all in one piece, sides and bottom.


Side paper glued in. You'll notice a slight overlap at the bottom - making sure there are no gaps. I used ordinary PVA gle (white glue, dries clear).


The inside of the finished box. You'll note I didn't glue paper over the hinge as this is a tight-fitting lid.

A heavy application of gesso on the stamp and more repeat patterning
The outside of the box - a different stamp. I used gesso (again, applied with a sponge brush).


I didn't like the gesso - too stark. So I overstamped with Lumiere's Crimson (pearlised deep red) using the first block (the one I stamped on the paper for the inside of the box).


I did two rows of stamping, then blended in with a soft cloth before the acrylic was completely dry. This blended the paint a little, but still left a very dimensional broken texture.

Finished!
The finished book. Possibly still a little too floral on the cover for my taste, so I'll probably go ahead with some collage at some point. Or maybe it needs some text. Or not. I'll see how I feel in a day or so.

Showing the fastening and 'page edges' detail
Detail of the 'pages' I drew in with a dark grey Copic market. I overdrew with an opaque white pen (Ranger). The fastening is a piece of Grungeboard, cut to size and the corners rounded, then painted and stamped to match. I made two holes right at the top and applied eyelets (too thick to crunch, so I cheated with two sets applied from top and bottom to meet in the middle, with an application of Diamond Glaze glue and a whack with a hammer).

This meant there was a little too much movement of the Grungeboard just at the fore edge, so I made another hole and added two more eyelets in the same way (you can see there's an overhanging lip, so that's where I made the hole). To finish the fastening, I punched a large hole at the end of the Grungboard, and a small hole in the side of the box - then screwed in a hitch fastener. The Grungeboard hooks over beautifully.

Why bother? I carry the box (and contents) to classes, so this stops everything falling out. Nice, neat and secure - and now a lot more interesting to look at.

My Blog of The Week has to be Colouricious's blog - some great techniques and YouTube videos there, especially if you are interested in fabric art.

pink saturday

Finally, please visit Beverly at How Sweet the Sound to see all the other wonderful Pink Saturday posts - and don't forget to leave a comment if you want to win that blog header & button!

Thursday, August 5, 2010

MY DELICIOUS COLOURICIOUS BOOK IS FINISHED!

Kiss Journal - all photos copyright Susie Jefferson- all rights reserved
I finally finished my book! And yes, I'm very pleased with it.

Copyright Susie Jefferson
Side view showing stitching
Poor Peter - I forced him up into the attic and refused to let him down till he handed me all my art stuff - so now we're surrounded by a sea of boxes and I'm as happy as a clam! I finished sewing the book Tuesday, but didn't have a chance to photograph it till today as yesterday (Wednesday) I taught a Japanese Stab-bound class at Gerrards Cross Summer School - more of that in another post. So I've been up against it for time.

But I digress... back to the book which is the subject of the post....


I cut it wider than needed, so that I could repeat the spine measurement for the fore edge and fold the excess back over to the front cover, then create some kind of fastening. This ended up as hinges - TWO  pieces of die cut Grungeboard - flexible and very tough. I punched holes in the ends so they could go over hitch fasteners (fasteners and Grungeboad are by Tim Holtz).

Closeup of stitching
Clopseup of hinges
Hinge detail
The hinges were postioned with a dab of glue, then fixed with eyelets. Then I wire-wrapped each piece and over-wrapped a second time with beads and brass danglies.

Inside
The fold-over edge looked rather plain, so I hole punched down the length and wire wrapped again, a basic whip stitch.

Detail showing pen holder
 The finishing touch was a spiral of the cover paper (I cut off about 1cm from the piece folding back over the cover before I did the wire wrap) which I glued down, then eyeletted top and bottom for strength.

Hope you like it!

If you want to make your own, here's the link for my tutorial on Etsy. If you want to know how I made the textured cover, read the post below. If you too would like your very own hand carved wood blocks, contact Colouricious - tell Jamie Malden or Holly I said Hi!

Sunday, August 1, 2010

DELICIOUS COLOURICIOUS


Colouricious is a favourite company of mine. Owned by Jamie Malden (who just happens to be a very dear friend), Colouricious makes the most wonderful videos for artists - especially if you are interesting in quilting or fabric arts!

Here's my wonderful stash of wood blocks - which I will be adding to, you can bet! (Did you know you can have your own design carved, exclusively for you? Just like Anne Bagby?)

I had to photograph them before I used them: they're so nice and clean!
See how deep these wood blocks are? So easy to hold.

A hard choice - which to use first.
A lot of people are under the impression that you can only stamp onto fabric - not so!

BOOK COVER

I'm using heavyweight watercolour paper which I've already scored, ready to fold into a book cover.

I'm using just two stamps for this cover - the larger one for the central area in a repeat pattern, and the oblong one for top and bottom edges.
As you can see, I have coated the entire piece with gesso - very heavily (like buttering bread) and stamped INTO the gesso with uninked wood blocks. I stamped off onto scrap paper to remove the gesso from the bottom of the block before reimpressing into the wet gesso again (you need to work quickly, before it dries).

Here's a closeup of the stamped impressions: I've sprayed a little light green dye at the bottom to show up the indentations even more.

So dimensional: GORGEOUS!
Once gesso is dry, it's virtually indestructible - you can paint it, glaze it, spray it, and once the book is made up it will stand up to pretty much anything! The high points you can see here will not chip or drop off (at least, not for a year or three - and then, only if you treat it very roughly).

I'll be adding a lot more colour, also some metallic creams... just watch this space!

Want to know more about Colouricious and block printing? Just see the page (link just under my header) with YouTube tutorials, instruction DVDS and more!

Wednesday, July 28, 2010

COLOURICIOUS - FABULOUS RECYCLING IDEAS

COLOURICIOUS is a fabulous UK-based company run by Jamie Malden - an absolute powerhouse of ideas! Her latest projects are art DVDs, made and produced by herself, featuring mainly British artists.

Here's a taster of her latest, on recycling - with some wonderful ideas for cushions and a woven bag (pretty much completed in the clip) so watch the DVD, turn up the sound, grab a coffee and ENJOY.....


I for one am going to have a go at that woven bag!

Additional: check out my Colouricious page for some project ideas.
post signature